White Tulip Designs » Inspiration, Design, and DIY for all of life's events.

Masthead header

Kitchen Luxuries You Shouldn’t Live Without

(Don’t forget to stop by and pick up your freebie at the end of the post!)

Do you remember when you were first outfitting your very first kitchen? Back when you were thrilled to have enough pots and pans to put together an entire meal for more than one person. And then, the absolute satisfaction when you felt like you finally had everything you might need to cook and bake just the way you wanted to. Then a few years later, you found a fancy new recipe that were just dying to make for a special dinner but you had to buy a special pan, or tool. And next you knew you had a collection of odd kitchen tools so large you needed a new cabinet just to keep everything. At that point you put on the brakes and decided, right then and there, that it’s time for some will power and if you don’t have it, you don’t need it. Right?

Maybe, but I’ve found a few simple kitchen tools, that may be a bit of a luxury, but that I’m thrilled to have on hand. I know they are not absolutely necessary but love having them.


Zester -

I ordered my zester ( grater/microplane whatever . . . ) back in late 2014 and I can’t figure out what I did without it. I use to “zest” citrus fruit and fresh nutmeg for lots of recipes and I also use it to grate lots of different hard cheeses, which is exactly what it’s meant for. However, the thing I love to use it for the most is to give a fine grate onions for things like quiche or other recipes that really need the onion-y flavor but chopped onions really throw off the texture. And once you’ve grated your onions you can still saute them in a bit of butter to bring out the flavor. Mmm, mmm . . .


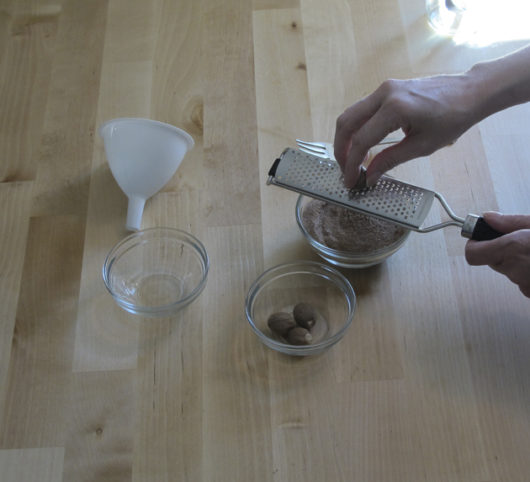
(This is the exact zester I use. It is dishwasher safe but be careful it doesn’t get bent.)


Portion Bowls -

You wouldn’t believe how much faster recipes come together when you use portion bowls to measure everything out first! And, if you’re hosting friends (and chatting) while your cooking it helps keep you from incorrectly measuring ingredients while your attention is somewhat divided.


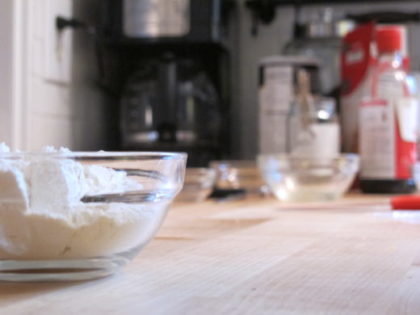
(I actually have 2 sets of portion bowls put together. Larger bowls - Smaller ones.)


Mobile Trashcan -

It was a total surprise to me how much I love mine. Being able to easily slide it around as I need makes the space in my kitchen so much more efficient. If you have a smaller kitchen I would definitely suggest it. I made mine from an Ikea trashcan but Amazon also has some great options if you don’t have time for a DIY project (ot a trip to Ikea)!


(Here’s my Ikea trashcan DIY and here is a high-end ready-made option!)


Conversion Chart (at your fingertips!) -

I know, almost every decent cookbook has one in it and let’s not forget . . . the internet. But think about how easy it would be, when you’re up to your elbows in flour to have one literally in front of you? That beings me to my funny story. When we first remodeled our kitchen I was so proud of the conversion chart I had created and attached inside one of the cabinet doors. (I copied the chart from the internet and then added my own cute little artsy details.) Until, I was halfway through a recipe when I realized the chart I had copied was incorrect. (UGH!)


So, to keep you from having the same nightmare I did, I create a special chart just for you! Download your chart from here to your computer. Print it, cut it out (it’s 5×7), stick it inside your cabinet door and you’re all set!! Enjoy!


In the meantime, I’d love to hear what your favorite, not-so-common kitchen tools are. Please comment here or pop over to my Facebook or Instagram and share!!


Save

Save

Save

Save

Save

Save

Save

Save

Save

Save

Save

Save

Save

Save

Save

Save

Save

Save

Beginning Again

Over the past year of not blogging, I’ve actually picked up new followers (thank you for joining in!) so, to kick things off, I thought I’d share a round up of past posts/projects that were particularly popular. As well as some that somehow slid under the radar. (Let’s see if we can do something about that!)

My number one post (and I have to admit, it really surprises me) is: No More Wasted Space.


I used scrap wood and  created a small magazine rack for my kitchen. It’s been a super useful project and I do still use it all the time but for the life of me, I can’t figure out why it’s been so popular. As a side note, it was shared over on Hometalk and generated a heated discussion as to the practicality of it. In the 2 years I’ve had it in place, no one has ever hit it with the door but (I mention this in the original post) I was very careful to place far enough back on the wall that it shouldn’t ever happen.

Another popular project was my Printable Spice Labels. 


This was a companion post to my DIY Spice Rack post. I was really pleased with how these turned out but, honestly, I think I would go with smaller bottles next time.

In the summer of 2015 I had a project picked up by a major children’s blog in Europe, the Watermelon Rope Swing.


I had a blast making it but I think I enjoy swinging on it more than anyone else. (Much to the dismay of my 16 year old.) Although, when we have guests over, they really love taking a turn. Yeah, I’m not sharing that video. OH, and I’ve checked with an arborist, there is absolutely no problem with having the hook screwed into the tree.

My Gallery Wall post was also quite popular but I was never really happy with the pics. I think the dark color of the wall and the lack of sun that comes through that window made, even the best ones, kind of grain-y.


We’re in the process of doing some re-arranging now so maybe I can persuade one of my photo-genius friends into taking some new pics for me. I will say, it may not photograph easily but I’m still in love with my big blue wall! 

Ok, so that brings me to my all-time favorite project. The funny thing is, it never seemed to catch on. But as far as the DIY projects I’ve created for my house go, it is still my favorite. And it’s really pretty simple. Let’s give her another try, please? It’s a Faux Mounted Butterfly.


I know, I can see why you might think it’s weird. But, hear me out. I love vintage-y decor items and those somewhat gruesome mounted butterflies (and other critters) fall into that category. But after having to do a butterfly mounting project in high school I thought it would be much nicer to be able to have one without having to kill and mount an actual butterfly. So, I painted some and that’s how I came up with this project. Ta-da! And, you get some free printable watercolor art. Also, if you’re still not into the whole “mounting” project, the artwork is set up to be a nice frameable piece anyway.


If you’re new here, I hope that helps you get a little caught up and I’m looking forward to seeing you again soon! If you’re interested in seeing more of my watercolors you can catch regular updates in my Instagram feed. CLICK HERE!


Save

Save

Save

Save

Save

Save

Save

Save

Let’s chat . . .

Hello friend, I hope you’ve been well. If you have a minute, grab a cup of coffee and let’s have a chat.


It’s been roughly a year since I last posted. (As a matter of fact, last Friday was one year exactly.) Sometimes life takes priority and you have to step away from things but I also felt like the blog itself was getting away from me a bit and I wanted a chance to refocus and get a clearer view of what I wanted my blog to accomplish, how I wanted it to look, and what I need to get out of it all together. Home decor projects will still be a part of the blog. I will also be adding more varied content that fits who I am and the kinds of things I’d like to learn about (food, fashion, friends, parenting teens, new design ideas, etc.)

That being said, as much fun as I have blogging I can’t justify putting that much time into it without some sort of financial return. However, I really don’t want to resort to covering my entire site with ads. I know that is something that most successful bloggers do but I find it such a turn off when I click over to read a post and I have to do battle with scrolling through ads just to read it. So, for lots of reason like that I’ve chosen to stay away from ads altogether. I will, however continue to use affiliate links, product features, and other more subtle (less blink-y) means of of making an income from the blog.

Over the next few weeks I will be introducing digital products into an online shop as well as continuing to promote my shops on other platforms (Etsy, Spoonflower, and Society6). I don’t plan to introduce any membership or subscription programs but I may consider something like that in the future.

We have had a fairly productive year here at the WTD house and I’m looking forward to sharing new projects, info, and advice with you. And, I’m also interested to hear what you have to say and what you’d like to see. You’ll notice changes as we go through the summer and I’m super excited about sharing it all with you!

I’m excited to be back at it and I hope you are too!

Enjoy your weekend, I’ll see you next week!


Jennifer (White Tulip Designs) - 10/05/2017 - 2:55 pm

Hi! If you’re planning on a “statement” wall color, I say go for it! But, be sure your detail items (towels, dishes, small appliances, etc.) will coordinate. You don’t need to have everything match perfectly. Keep in mind that too many competing colors and/or patterns can make your kitchen begin to look cluttered and unorganized. I like to go with darker neutral colors so that I can change my decor items more easily without one over-powering color to dictate all of my other design choices.

Thanks for the question!

ardith sandoz - 07/22/2017 - 11:50 am

how much contrast can I put in a small one wall kitchen

Farmhouse Vase


Jar Vase - WT - 7


Now that I’ve discovered the wonder that is Trader Joe’s and their gorgeous (not to mention CHEAP!) flowers I tend to buy fresh flowers pretty often. But, I’ve realized that I never have a suitably sized vase. I have a few bud vases and a few that would work for a large bouquet but nothing for a sweet little grocery-store sized bunch. So, today I’m sharing a sweet little “vase” project that is just right!

You’ll start with blue painters tape and a large canning jar (I used a wide mouth, Ball brand jar.)  I also used Country Chic’s All-In-One Elegance paint as well as Country Chic’s White Wax.


Jar Vase - WT - 1b


To create a more farmhouse, vintage look I used the “Elegance” blue from Country Chic Paint.


Jar Vase - WT - 2


I taped out a wide band around the lower portion of the jar, leaving the decorative detail open so I could free-hand that part. Then I let it dry for about 3 hours.


Jar Vase - WT - 5


Using a lint-free cloth, I applied a coat of Country Chic’s white wax, going a little heavy around the details to make them really stand out. I used a Q-tip to clean up around the edges where the wax went beyond the painted area.

To be sure the wax had time to dry really well I let it sit for about 3 days before I added flowers. It’s the perfect addition to add a bit of farmhouse flair!


Jar Vase - WT - 6


Thanks for stopping by! See you soon!


.

Five Dollars, WELL spent!

Today I’m sharing my first project for Country Chic Paints!  I lucked out and found this sad little table when I was thrift store shopping a while back and just new I could save her. Not to mention, she’s the perfect choice for a new side table. 


Metal Table 1


Pretty yucky, right? After I got her home, I proceeded to strip, scrub, and sand as many layers of paint and rust off as possible . . .


Metal Table 2


It was an even bigger job than I thought. Once I used everything I could think of to clean her, I used a heavy duty primer to seal the metal from top to bottom. And, still, there were some pits on the surface (grrrr). Thanks to Country Chic Paint’s Embossing Plaster and a putty knife I was able to smooth out most of the surface.


Metal Table 3


Metal Table - WT - 6

Worked like a charm! I let it dry overnight, gave it a light sanding, and then I painted her with Country Charm’s “Simplicity” white, all-in-one paint.

Isn’t she lovely!!!

Metal Table -Cover


This was my first chalk paint furniture project and it will definitely not be my last. I’m loving the coverage and hoe easy it is to work with!!


Metal Table - WT - 8


I hope you enjoyed it! See you soon!


D I Y   S h o p