White Tulip Designs » Inspiration, Design, and DIY for all of life's events.

Masthead header

DIY Shelves

Don’t you love it when you’ve been thinking about finishing a project for so long and you FINALLY get to show it to someone? I’m so excited to share an update on my TV Wall. I’ve finally gotten the shelves finished and in place. Here are the inspiration shelves from the original post:

A -TV wall inspiration shelves

These shelves from Ballard design  and are $499 each. My DIY shelves came from Ikea and are much less expensive. (I’ll include a price breakdown in the how-to post to follow.)

Here are the Ikea shelves I started with:

Ikea Shelves- before

These were only $14.99 each but they weren’t very sturdy, and they also weren’t nearly tall enough. So, I devised a plan to fix those issues but also to upgrade the overall look! I started by painting them a flat black. Then I added wooden shelves that I stained and finished with beeswax. And, finally, I added a base made from pallet wood, to add stability and height to the overall shelves. As an added bonus I’m finally able to hide that hideous pile of wires under the base!

      Upgraded Shelves- detail

I do think I’m going to need to give the TV chest a makeover soon to help everything tie-together a bit better.

The entire project was quite a long process so I’ll be sharing a complete how-to a bit later.


Linking up at Metamorphosis Monday, WoW Us Wednesday

Chalkboard Printable Project

I’m sure by now you’ve seen 2-3 hundred chalkboard tutorials but I finally had a chance to change my kitchen chalkboard and I thought I’d share a printable template that you can use as well as how to use it and fix it!

Chalkboard project with printable guide


Start by printing the template (on multiple pages) and tape together using the guides. (see directions below)

Chalkboard - printable (Select pic for printable file)

To prepare the template flip on the back and shade over the lines with chalk. Try to keep it as close to the lines as possible so that you won’t have too much dust to rub off onto the board while you’re working.

Chalkboard 2

Measure your chalkboard and draw a level line with a center point along the top to guide where you place template. The guidelines that print on the pages will also help with centering the template on your board. Lay the template in place and tape down with painter’s tape or masking tape.


Chalkboard 3

With a ball point pen (a colored pen helps) trace over the letters to transfer the chalk to the board.  I recommend working top to bottom and left to right , or right to left, if you’re left-handed. Now, carefully remove the template from your board by “peeling” it from one side to the other.


Chalkboard 4

No you can go back in and fill in your guide lines. Piece O’ Cake!! Don’t worry if you color outside of the lines, we’re going to fix that later.


Chalkboard 5

You can see in my close-up pics where things got a little wonky. When you are completely finished you can use a small (cheap) paintbrush with a little clean water to clean up the stray spots and make your lines a little straighter. I suggest dabbing off the excess water onto a paper towel before starting as this will help avoid water running down your board. (Yes, that happened. Yes, I was hoppin’ mad.) But, it’s just chalk and water so it’s not too tough to go bad clean clean up any mistakes.

I’d love to see pics of your chalkboard projects! feel free to share your chalkboard story on my Facebook page! (If you have a project on your blog feel free to link directly to your blog.)

To Print:

  • 1. Save the printable PDF to your computer. Then open file and select the “Print” option.
  • 2. On the “Print” screen you should be able to select the option to print “Poster”.  And set the “Overlap” option to .25 and make sure tile scale is set to 100%. (The “Overlap” will help you put the pages together using the guidelines.)
  • 3. Set the number of pages to print to “All” and Print!

Chalkboard tutorial with printable


I’m linking up over at Metamorphosis Monday

Jennifer (White Tulip Designs) - 05/19/2015 - 10:48 pm

Cute! (I love the pink!) Please feel free to add a link to it on my Facebook page!

Sunnefa - 05/19/2015 - 12:30 pm

I love your printable! I made a similar post on my blog just last week, that printable was for a bathroom decoration 🙂 I didn’t think of the paintbrush with water for clean up though, great tip!

Spring Living Room - Saturday Style

Happy Saturday! I’m kicking-off a new, weekly, fixture on the blog today. Saturday Style! I love inspiration boards and I thought it could be a fun addition to the blog to help get our creative juices flowing. Saturday Style will feature different inspiration boards, color pallets, and even some design news each week.  These will include home design, landscaping, and even some fashion boards. I’ll be creating the boards in Polyvore if you’d like to see a preview of boards to come.

For this week’s Saturday Style I wanted to put together a collection of items to freshen up your living room for Spring without going to heavy on the pastels. I hope you like it!


Saturday Style Board - Spring Living Room


Spring Living Room by White Tulip Designs featuring

Zara Home Drum shade / Flowered rug / Navy throw blanket / DwellStudio outdoor garden decor / Gold home decor, $65 / Blue accent pillow, $62 / Island home decor / Italian home decor / Zara Home throw pillow, $6.30 / Crate and Barrel weave basket / Fabric home decor / Window candle / Minimalist home decor / Dot Bo sofa / Pottery Barn tufted armchair / Boston furniture / Eco friendly furniture / Two drawer console table / Regina Andrew Design pattern table


And, in recent design news:


For more Saturday Style click here!

Linking up at Met Monday,

Jennifer (White Tulip Designs) - 07/27/2015 - 11:04 pm

Thank you Trish! I’m so glad you like it!

Trish - 07/27/2015 - 10:15 pm

Beautiful selection. I am a fan about texture and patterns.

Glass Vase with Gold Trim

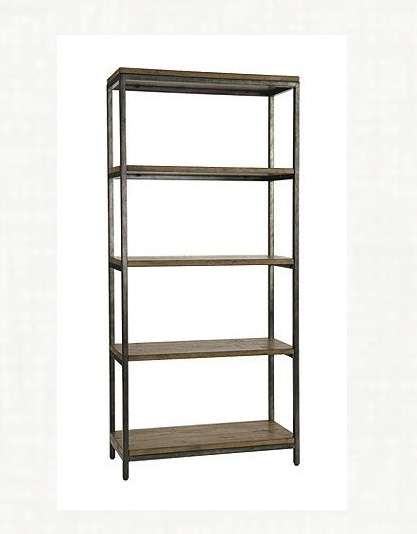
Hi! I hope you’ve been able to enjoy some warm weather this week. I’ve been finding it hard to stay inside and get any work done. It seems that people fall into 2 categories. You either love yard work or you hate it. And, if you love it, you can’t call it work. You may sweat, breath a little too heavy and end up with dirt in unseemly places but you love every minute of it. That’s me. I’m not necessarily great at it but I love it. When I was young and single I had a precious little container garden that I tended and rotated throughout the year. Our yard has been a bit of a monster and my Hubby is in the other camp who doesn’t get us dirt huggers. So, with all of the pretty days this week I’ve had a tough time getting projects finished. However, the new shelves along the TV wall have been completely empty so I’ve been concentrating on those as much as possible.

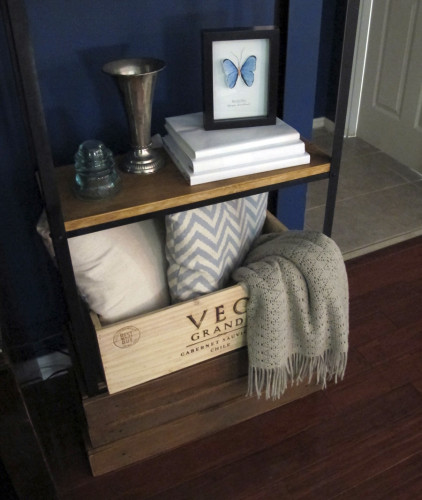
With the new shelves the TV wall/Living Room is finally starting to come together! Now I’m trying to get them organized and styled. Since the wall behind is that deep shade of peacock blue (see the Gallery Wall) I’m mainly adding things that are white and lighter colors.


Glass -main


I’ve had a large aqua colored glass vase that I’ve been wanting to do something with for a while. I wanted to add some gold detail to give it a bit of zing but I wasn’t quite sure exactly what. Then I had the idea to do some sort of drawing on it. As you can imagine, drawing on a slick, round object can be, shall we say, problematic. So, I had the idea to use a stencil.


Glass vase with gold details
I started off by testing the gold Sharpie marker that I wanted to use along the rim of the vase. After a few, not so successful, attempts I finally decided to use Mod Podge to adhere and seal the stencil to the vase. (I realized later that they make a stencil spray for this sort of thing so you may want to try that instead.)

Glass and gold trim project


When I had the back of the stencil completely painted I carefully placed it onto the glass and taped it into place. Then I let it dry for about half an hour. To make sure the stencil stayed stuck to the vase, I used parchment paper to hold it tight.

Glass 3

At this point, I used a gold metallic Sharpie to outline the portion of the stencil that I wanted to use. The Sharpie is still going to bleed behind the stencil but it won’t be nearly as bad you think (trust me!)


Glass and gold project


Next, I carefully pulled off the stencil, from one side to the other and then used the marker to fill in some of the details. I did it sort of free hand since I wanted it to have a bit more personality.

Glass vase with gold detail added
When I was satisfied with everything, I used a Q-tip a little acetone to clean up the edges and the details. If your Mod Podge gets a bit yucky you can use the acetone to clean that as well. (*See note below for more on using acetone.)

I’m pretty happy with how it turned out. And I’m looking forward to having a nice spot for fresh (and not so fresh) flowers!


Glass vase with gold trim project from White Tulip Designs


Here’s the inspiration post I started with: TV wall inspiration post!

**Acetone can be a great tool and cleans up a multitude of sins. But, be VERY careful. It will ruin floors, countertops, and anything it happens to land on. There’s no way to clean it so you’ll want to use it sparingly. And, most of all, you’ll want to keep it far away from children and pets. FYI - pure acetone can be purchased anywhere that sells nail polish.


Linking up at Metamorphosis Monday


Jennifer (White Tulip Designs) - 06/01/2022 - 10:58 am

Thank you!

Jenna - 06/01/2022 - 10:00 am

very nice, love the gold on the soft aqua

Decorating With Book Pages

You’ve seen my book page project. But, if you’re looking for more ideas and tutorials I’ve created a round-up of 12 more, creative, book page projects for you to try!


Here are a few great ideas for children’s rooms . . .

book pages - kids


1. Cute little Owl from The Sits Girls (does not include tutorial)
2. Girl with Red Balloon from lazydoll’s Etsy shop 
3. Bunny Butt art from Home Made Modern
4. Golden Book Bunting from I Restore Stuff

And, of course, you can’t forget the rest of the house! . . .

book pages - more


1. EAT book page and utensils from Holy Craft 
2. Lampshade from Mari Makes
3. Paper Bead Bracelet from Craftstylish
4. Paper Lanterns from Sweet Paul
5. Pinwheel Banner from Ella Claire Inspired

And here are some even more creative ideas!

book pages - 3D


1. Book page wreath from Stephanie Lynn at Under the Table and Dreaming  
2. Storybook Paper Roses from 100 Layer Cake
3. Bookpage Birdhouse from 2 Bees in a Pod


Here are some from my house! FYI - The page on the left is unaltered. I love using artwork from old children’s books for a unique conversation piece.


book pages - mine


 Linking up at Wow Us Wednesday, The Scoop

Jennifer (White Tulip Designs) - 08/28/2015 - 9:03 am

Thank you Cyndee!

Cyndee - 08/27/2015 - 10:29 am

So clever! Love all the ideas with book pages! Thank you for sharing on Idea Box!

Jennifer (White Tulip Designs) - 05/26/2015 - 10:14 pm

Joy, thank you so much!

Joy @ Yesterfood - 05/26/2015 - 8:49 pm

Jennifer, I love these ideas! I was just over at Goodwill this afternoon, looking for children’s books to use in a craft project- so glad I found your post before I started! Sharing this on G+! Hope you’re having a wonderful week!

D I Y   S h o p