White Tulip Designs » Inspiration, Design, and DIY for all of life's events.

Masthead header

An Autumn Shower

I’ve been working with brides for about 7 years now and every year Autumn becomes more and more popular for wedding celebrations. The weather can be brisk at night but is usually quite nice during the day and early evening. It’s just cool enough to be able to layer your clothes and maybe even sport a pair of hot new boots. Floral options can be a bit limited but can also be quite unique.

Today I’m sharing an inspiration board using a modern fall palette. From outfit and floral ideas, all the way to menu and invitation choices, it’s all here!  And, more to the point, an Autumn themed bridal brunch!

Autumn Brunch Inspiration Board


photo credits/links - clockwise starting upper left corner:

  1.  Cloe Skirt/Blouse from Pretty Plum Sugar
  2.  Table arrangement  from Ariel Dearie Flowers.com
  3.  Archive Rentals
  4.  Mini-pancakes with blueberries - Austin Wedding Blog
  5.  La Petite Delicat
  6. Coffee Bar - Jesse Daniels Photography via Style Me Pretty
  7. Elegant pumpkin details - Intimate Weddings
  8. Cocktails - Lindsay Brunk Event Planning
  9. (center) Fleurs Sauvage - from Paperless Post (for coordinating pieces)


Stay tuned for more Autumn Inspiration!!


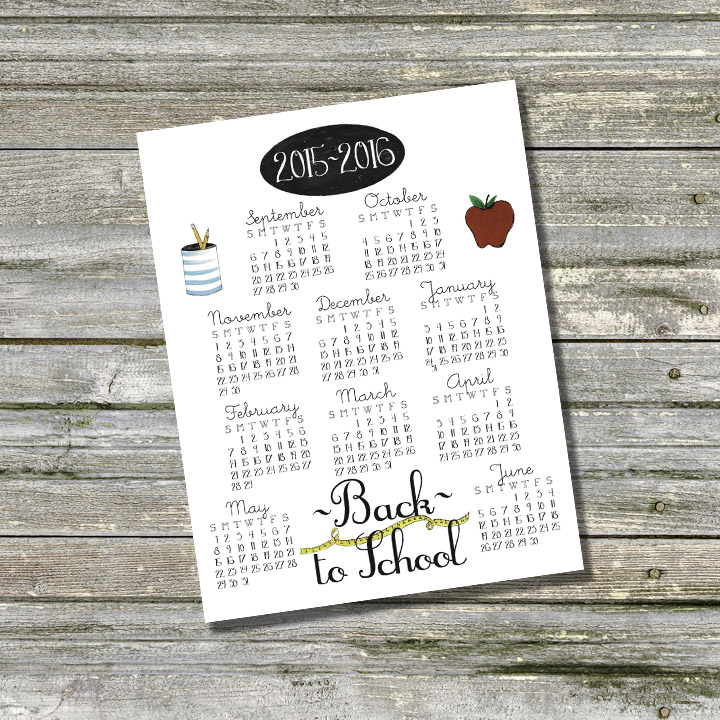
School Calendar 2015-2016

Here we’ve been back to school almost 2 weeks and if you’re in an area that’s not back in school yet, you probably will be soon. I’ve been working on new artwork for the shop lately and thought I’d put together a printable back-to-school calendar!


Calendar cover

It’s set up to print on regular 8.5 x 11 paper. Click on the download below and print, it’s that easy!

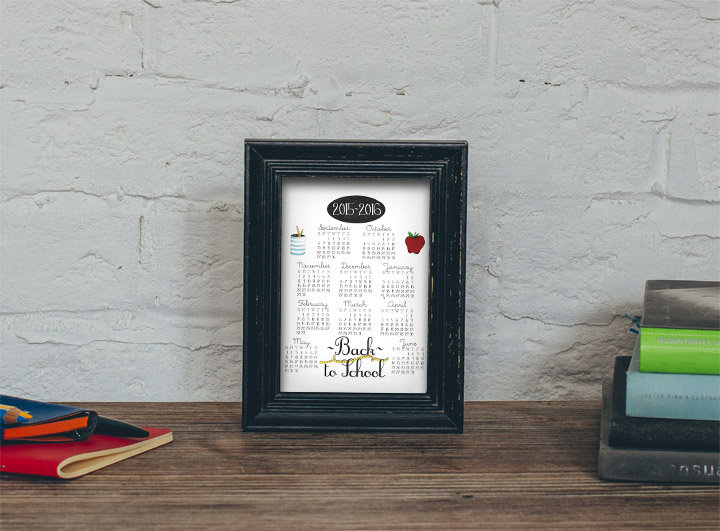
If you prefer to print it as an 8 x 10 for framing, simply open the PDF in Adobe, select “Print”, then select “Page Set-up”. In the “Page Set-up” window, select the “Paper Size” option and choose 8 x 10 and click “Ok”. Back in the “Print” window, select either the “Fit” or “Shrink to Size” option and your good to go.


Calendar Mock-up

Stop by the shop later this week to see the new printable items!

Click and download from here: Back-to-School Calendar - Enjoy!

Bonus wallpapers! Tablet - Desktop

Back to School -PC Desktop      Back to School -Tablet


Have a lovely afternoon! See you soon!

I’m linking up at: Met Monday,


Laying It All Out!

 A while back I had a question from a blog-fan about how I did the layout for my “Geek-Chic” sign. Graphic design is my day-job so I always use the Adobe Creative suite to create text layouts. InDesign (and sometimes Illustrator) are the appropriate programs for text layout but for a quick (and Free!) text layout I’m going to show you how to do it in Word. I know you’re thinking this seems impossible but I promise it will work. If you are creating a photo or artwork based layout, I suggest you use PicMonkey. (Here’s a PicMonkey tutorial from last year.)


To be honest, this is not a very smooth, easy way to create a large, text layout and I highly suggest investing in a short subscription to the Creative Cloud if you are planning to begin creating multiple projects but for a 1 time, Free, option, this will work. (As you move along, select each pic for a larger size.)


  1. Open a new Word.doc and select the “Page Layout” tab 
    Word - page size
  2. In the pop-up window you’ll select the “Paper” tab (it should come up automatically) and under “Paper Size” scroll down and select: “Custom size”. Word won’t let you set up your layout to be larger than 22″ on each side so I set mine up to be 15″ x 20″ so that it will up-size to scale.  (Later we’ll increase the final dimensions, for print.) A message will pop up asking to “Fix” the margins. You’ll want to select the “Ignore” option.
  3. Select the “Insert” tab and then the “Text Box” drop down menu then the “Draw Text Box” option at the bottom of the list. I will be leaving my box outline for the tutorial but you’ll want to select the “Shape Outline” drop down under the “Drawing Tools” tab and then select the “No Outline” option.
  4. Your curser will become a plus sign (+). Drag from the upper left to the lower right to create a large rectangle. When you release, your curse will begin blinking inside. Word - text box
  5. Select the “Text Effects” drop down menu. Then select the “Transform” option;
  6. You may want to play around with the different text effects to see what works best for your project but for this tutorial we’re going to select the “Follow Path” - “Arch Up” option.  Word - arch up option
  7. Type in your first line of text. Now go back and highlight the text. Select the “Home” tab, center your curser, choose your font (I’m using Academy Engraved) and increase the pt. size to 150 (you can highlight the number shown and input whatever number you like.) Word - text options
  8. Select the area outside of the box and . . . Ta Da! You have an arched line of text. But wait, now there’s a bit of a spacing issue, right? (Depending on your text and font choice, you may not have an issue but I want to show you how to fix it, just in case.)Word - spacing issue
  9. Highlight the letter before the gap, right click your mouse, and select “Font” from the drop down menu and choose the “Advanced” tab.Word - font fix
  10. Select the “Kerning for Fonts” box, change the “Spacing” option to “Condensed”, and change the number to 5. You may need to adjust that up and down until you get you letters just where you want them.Word - arch text
  11. You can use the handles on all side of the box to adjust the arch and make it wider, tighter, etc. as well.
  12.  Get your file ready for print! Select the “File” tab and the “Save As” option. In the “Save As Type” drop down menu choose the PDF option and save. We’re not done yet, so select the option to open after saving.
  13. Choose: the Print option, select Adobe PDF from the Printer options, and select the “Properties” button. Input the appropriate page size or choose to input a custom one.Adobe - PDF settings
  14. Now, you can use the “Custom Scale” to up size your text. You won’t be able to get it too much larger but you can play with it to get a size that will work for your project.
  15. Click “Print” to save your new PDF. You can now take your up sized PDF to a big-box print (like Staples or Kinkos) to get a large format print. Ask for an engineering print for a much cheaper option. They are black and white and the paper is thin and easy to work with for tracing and other projects.


I really hope this helps in creating your sign layouts!

Do you have a questions about any of my projects, that I can go a little more into detail with? Don’t hesitate to ask!

Have a lovely afternoon!


Share Some Handmade Love!

This week I’m issuing an Instagram challenge. If you or someone you know has a business where they either sell or promote handmade items online, this is for you! Add a pic of  your newest creation to your Instagram account and be sure to include the hashtags: #tulipgirlhandmade and #whitetulipdesigns. Don’t forget to tag me: @tulippapergirl and, most importantly, tell a bit about your business and or the handmade item you’re including! The challenge will run through this Saturday, August 29.

I will be promoting all your handmade creations across all of my Social Media platforms: Instagram, Google+, Facebook, Twitter, and Pinterest. If you have any questions, please feel free to comment or email.


Instagram Challenge

You can head over to my Instagram page and follow along to see my favorites! I did want to share a few of the early joiners.

Prodigal Pieces

Prodigal Pieces - Horsey Game Table

Larissa, from Prodigal Pieces shared this adorable horsey game table that she made from a broken rocker, crib parts, barn wood, and other various pieces. Hop over to her shop to see more of her original creations!


The Palette Muse

The Palette Muse - Tea Towels for GiveHerLife.org

Meredith, from The Palette Muse, shared these lovely tea towels. She is donating a portion of the proceeds from these to a wonderful organization called GiveHerLife.org. Be sure to check out Meredith’s shop to see all of her lovely tea towel designs!


Shawna

Shawna’s Wreaths - Fall Wreath

Shawna’s shop has a collection of wreaths for many different occasions. She uses both burlap and grapevine as a base for her various designs. If you’re looking for a fall design stop by her shop: Shawna’s Wreaths for several choices!


Keep looking out for all of the linked items here and on Social Media!


See you soon! Have a lovely day!

Quick & Simple Vintage Poster Display

The summer is slowly coming to an end and I’m so excited for fall. It’s so hard to keep working on things around the house when I’d much rather be in full - craft mode with new Autumn and Halloween projects. Oh well, priorities, right? If I don’t finish and get the downstairs put back together soon, I’m going to regret it when the holidays roll around. This summer has been in accelerated chaos gear since June. I don’t know who I was kidding thinking it would be easier with G at home.

For example, today’s project should have come together much quicker than it did. But anyway, here we are and I hope you enjoy it!

Generally, the overall “look” of our living room is finally starting to come together. I’m going for an eclectic mix of vintage-y details and bold colors and patterns. Sort of a boho-chic feel.

Since you already know I have a bit of a thing for birds this project won’t surprise you at all. I found this vintage-look, Cavallini & Co. poster from Pomp & Posey’s Amazon shop a few weeks ago and had to find some way to display it. The “frame” has a classic schoolhouse look and doesn’t put any holes in the poster itself. (Bonus!)

Display - profile

The poster is held between 2 -felt lined wood pieces that are tightened using hex-screws and hung using eye screws and simple twine. All of the wood was scrap trim that I found at my local Habitat for Humanity Re-store The thicker back piece is plain and flat ad both front pieces have a decorative profile.

Display - 3                     Display - 2


The hex-screws, placed an inch from each end, hold the front piece to the back piece nice and tight. That way, when I’m ready to change the poster all I have to do is loosen the screws and slide it right out! Easy peasy! The blue tape you see was to hold the pieces together while I measured and drilled the holes. It really helps keep everything from moving around while you’re trying to keep everything lined up.

Vintage Poster Display

Have you created your own “vintage” project? I’d love to hear about it! Feel free to share pics on my Facebook page!


I’m linking up over at Met Monday, Something to Talk About,

Jennifer (White Tulip Designs) - 09/26/2015 - 4:36 pm

Thank you for stopping by, I’m so glad you like it!

Jeanne Grunert - 09/25/2015 - 3:14 pm

I really like this idea, and especially the bird poster (that’s what caught my eye on the Home Matters Linky Party.). Great idea for those vintage art finds. Looking forward to more of your posts - I’m a huge vintage fan.

Jennifer (White Tulip Designs) - 09/23/2015 - 8:26 am

Thank you Jess!

Jennifer (White Tulip Designs) - 09/23/2015 - 8:25 am

Hi Julie, thanks for stopping by!

Jess - 09/22/2015 - 3:59 pm

This is very cute!

Thanks for joining Cooking and Crafting with J & J!

Julie - 09/22/2015 - 2:39 pm

Hi Jennifer,
You did a great job getting the vintage feel for this post and I love how you framed it to hang on the wall.
Thanks for sharing this with Cooking and Crafting with J & J.
We hope to see you again.
Julie at Julie’s Lifestyle

Jennifer (White Tulip Designs) - 09/21/2015 - 10:29 pm

I’m so glad you like it! Thanks for stopping by!

Iris Nacole - 09/21/2015 - 10:42 am

I’ve always wanted to do this project. I just haven’t found the right place for one to hang in my home yet. Your version is perfection! Thank you for sharing!

[…] White Tulip Designs - Quick and Simple Vintage Poster Display […]

[…] White Tulip Designs - Quick and Simple Vintage Poster Display […]

Jennifer (White Tulip Designs) - 09/18/2015 - 5:30 pm

Hi Meredith, I’m so glad you like it! Thanks for stopping by!

Meredith @ The Palette Muse - 09/18/2015 - 1:18 pm

This is brilliant! It fits the vintage look perfectly and I love that you can change it out later if you want, without harming the poster. Pinning!

Jennifer (White Tulip Designs) - 09/18/2015 - 8:35 am

Thanks! I’d be happy to!

Vicki and Jennifer Fenton - 09/17/2015 - 9:30 pm

Hey Jennifer-

we love this project! Thanks for linking up with us at Something to Talk About. Could you please link-back to our blog so that you can be considered for a feature on Monday?

Thanks so much! Can’t wait to see your Fall tour!

D I Y   S h o p