White Tulip Designs » Inspiration, Design, and DIY for all of life's events.

Masthead header

Spring Flowers

Spring Flowers


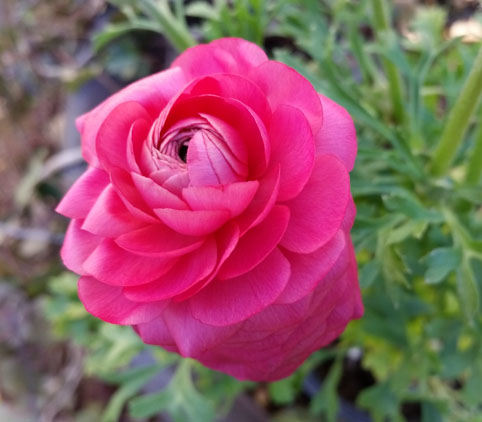
Don’t you absolutely love this time of year when winter has finally started to retreat and the world starts to brighten up all around us? I know that gardening can be sort of an acquired taste and sometimes a futile effort but I love it! Well, when I have time that is.  (I finally found a Persian Buttercup to enjoy this year! They really prefer the chill but hopefully I can convince her to hang around a while.)


Persian Buttercup - Ranunculus


Part of the pay-off of the DIY process is the instant gratification from the finished product. I love spending a sunny afternoon digging in the dirt.  The difference is, when you finish a planting project that’s usually the beginning of the pay-off. You have to be patient and wait for vines to creep and blooms to burst into glory. (You can’t beat a purple Pansy, I found these looking quite sad in the big box hardware store for $1 each! They perked right up as soon as I planted them!)


Pansy


And then there are the bulbs and perennials that you wait for in the spring to come back around like old friends for a visit. (Liriope is such a sweet, understated flower that is only too happy to play a supporting role until my Tulips decide to make their big entrance. In my yard bulbs always get planted in pots as an added layer of security from local varmints, lol!)


Liriope Muscari

Tulips


It is a wonderful feeling to walk outside after a week of rainy days and see you little plants begin to smile and grow. It’s the springtime version of finding lost money in a pocket when you pull out a jacket for fall weather.  (It seems so funny to get so excited about a small pile of sticks a few tiny little green leaves but I watch for them every spring. It’s the first signs of my beautiful hydrangeas!)


Hydrangea


I can’t wait for it to warm up just a bit more so I can get started on my garden projects for this year! Can you? I’d love to know what you have planned! Feel free to share your photos and ideas on my Facebook page!


Recipe - Orchard Punch

(Updated from the original post)

The perfect weekend cocktail for your outdoor soiree!

Try it with or without alcohol for a refreshing treat.

We’re having a little get-together this weekend and I thought this would make a great after dinner treat. It’s pretty easy and quite refreshing. Simply mix all ingredients together and let chill for about 3 hours or so before serving.

Orchard Punch

(Click recipe pic to print.)

Originally posted June 3013

Follow my blog with Bloglovin

Build Your Own Window Ledge

I’m so excited to finally share my new window ledge project! A few weeks back I posted a teaser pic on Instagram and this is the project I was working on. I’m also quite pleased with how the new shutters turned out! Our front yard is finally coming together. Step by step and day by day!!


Build your own window ledge (instead of box) with brackets, for flowers


It’s a fairly simple and inexpensive option as opposed to a window box. (You can read about the before process in this post!) Here’s my original inspiration from Chiots Run.


Pinterest - Window Ledge with Plant Pots from Chiot


I used pre-treated decking board from the big-box hardware store (see description here). I chose not to paint or stain it as I wanted it to wear and weather naturally. Also, I had to cut it down a bit to fit just outside the borders of the window by about 2 inches on either side. To keep from having to put things together while hanging out of a window or while clinging to the top of a ladder, I to work out the arrangement of my pots first.


Window Ledge - woode and bracket       Window Ledge - bracket layout


I started by setting out the Ikea brackets on top of the board and made sure they were evenly distributed from the edges. Then, using a pencil I marked where each bracket would go. Using the bracket marks as a guide, I then measured and placed my pots along the top the same way. Once I had them in place I traced around each container to be sure they went right back where they should.


Window Ledge flower pots


Now, for the fun part!  While taking special note of the layout of the pots and brackets I drilled large drainage holes along the center of the board as well as drill holes to attach the pots to the plank itself. It’s nice to be able to put guides all over the entire project and know they won’t be seen from the ground. If you’re thinking of adding a ledge on the first floor you may want to edit your guidelines a bit.


Window Ledge - drill holes and guides


Here’s the finished ledge! (We hung the ledge just under the window so that it would be easy to add the pits and flowers.) Stay tuned for flowers!!


Window Ledge instead of flower box


Thanks for stopping by! Have a lovely afternoon!

Linking up at Wow Us Wednesday

Mini Storage Ottoman

A few years back I managed to stumble on this adorable orange chair at a thrift store for a whopping $25! I’ve never been much into the color but the fabric was great and even looked like the upholstery might be new. I did think about re-upholstering it but it seemed like such a waste so I decided to work it into our decor as is. It worked great! I didn’t realize how much we had that it seemed to fit with and it’s so bright and cheery.


Mini -Ottoman - quick tutorial from White Tulip Designs


So now that my sassy orange chair has settled in to the furniture family I thought it was time to give her a little friend. She’s actually quite comfortable at first but the seat isn’t very deep and sitting in the chair can get a bit stiff after a while. I figured adding a footrest or ottoman was in order.


Ottoman


I had this unfinished wooden cube that I had bought from AC Moore a while back. So I added an upholstered lid with a hinge for storage and we’re in business!

Ottoman


I quick-stained the cube to coordinate with the wood trim on the chair using waterbased Minwax Woodsheen stain in Colonial Walnut. I’m not very adept at staining and this takes the fear out of a wood project for me. It’s basically idiot proof. Then, I measured the top/opening, taking into consideration which side would be the back for the hinge. Hubby but a piece of scrap wood to fit the top for me. I don’t think the type of wood matters here except that you want something thick and sturdy that hasn’t been exposed to water or the outside elements, or you’ll want to seal it.


Ottoman 3Ottoman 4


Now for the upholstery. . .  I used a low-loft batting that I had on hand (View in browser to see video)


I stapled the topper fabric all the way around by pulling it smooth and moving back and forth from one side to the other until it was firmly attached in place.


Ottoman 6    Ottoman 7


To give the inside a more finished look, I used a large piece of chipboard (poster board would work just as well), covered it in a coordinating fabric, taped it in place, and then I attached it to the lid using brass upholstery tacks.


Ottoman 8


For the hinge, I used a surface mount, 12 inch continuous hinge. I attached it to the lid (inside), using a drill, first and then place the lid on top of the box and attached it to the box the same way.


Ottoman 5Ottoman 9


The only thing left is to figure out what treasures we’ll be stashing inside!


Mini-Ottoman storage project from White Tulip Designs


*This post includes affiliate links to tools and products used in this project. All opinions are my own.

And a special thank you to G for being my cameraman for this project!

Linking up at:  Wow Us Wednesday, The Scoop,  Met Monday

[…] is for… Percy Sledge by Jingle Jangle Jungle Collecting Rain Water by Garden Up Green Mini Storage Ottoman by White Tulip Designs Stenciled DIY Coat Hanger for Kids by DIY […]

Easter dozen

As usual, I’m late dying Easter eggs. I always looked forward to it every year growing up. He’s a little old to get excited about it now so I’ve been on the lookout for a project that we could do together that would give me eggs to save as keepsakes. Once we decide which projects to tackle I’ll share pics on Instagram and Twitter so stay tuned!

In honor of Easter weekend I wanted to share a dozen of my favorite egg decorating projects from around the net. Enjoy . . .

Easter Dozen


1. Kool-Aid Easter Eggs from A Grande Life - This sweet project produces beautiful vibrant colors for your egg collection.


how-to-have-an-easter-egg-dying-party-7


2. Golden Speckled Eggs from Craftberry Bush - The little splashes of gold put this monochromatic perfection over the top. I love the addition of the tiny feathers to make a centerpiece!


goldenspeckeledeggscraftberrybush


3. Hand Stamped Eggs from Jennifer Rizzo - I love the “grown-up” look of this project. These could be a great decorative element all year round.


DSC_2212


4. Rit Dye Eggs from Urban Comfort - The color range in this collection of Rit Dyed eggs is absolutely amazing! AND - the tutorial also includes a list of color recipes for each shade. To Dye For!! (Sorry, I couldn’t resist.)


6a01156f70f21e970c0168e9316a6b970c-800wi

*check out more ideas on the Rit Dye website here.


5. Painted Eggs from The Littlest M - These would require quite a bit of time and talent but if you blew out your shells and took very good care of them they would make beautiful gifts to pass on to younger generations.


eggs


6. Confetti Painted Eggs from Landeelu - These would be a lovely decoration for a children’s party! And a great project for little hands as well.


Confetti-Painted-Easter-Eggs


7. Fabric Wrapped Eggs from One Dog Woof - A great use for fabric scraps. These could also be used (with a metallic paint pen) as a decorative place card!


IMG_9235


8. Black & White Easter Eggs from Obviously Sweet - So crisp and modern! A chic addition to an uptown Easter!


EasterEggs1


9. Confetti Dipped Eggs by Studio DIY - These are so festive and fairly easy to do with just a little Mod Podge and some glitter confetti! Super chic!


DIY-Confetti-Dipped-Easter-Eggs9-600x900


10. Eggs Decorated with Paper Napkins from La Receta de la Felicidad - Lots of style without a lot of time, supplies, or cost!


huevos-de-Pascua-IMG_02031


11. Silk Dyed Eggs from Our Best Bites - This idea gets first prize for originality. I love the idea of reusing materials but what genius thought of transferring the beautiful patterns from silk ties to Easter eggs? Amazing!


eggs-in-basket-2


12. Pressed Flowers from Whimsy Darling - These are so beautiful! The perfect centerpiece for an outdoor Easter brunch!


DSC_0839


 I hope you’ve enjoyed this little round-up and will be able to use some of these great tutorials in your Easter projects.

Have a blessed and beautiful Easter weekend!

1 Peter 1:3 - Blessed be the God and Father of our Lord Jesus Christ, which according to his abundant mercy hath begotten us again unto a lively hope by the resurrection of Jesus Christ from the dead,


Image credits: A Grande Life, Craftberry Bush, Jennifer Rizzo, Urban Comfort, The Littlest M, Landeelu, One Dog Woof, Obviously Sweet, Studio DIY, La Receta de la Felicidad, Our Best Bites, and Whimsy Darling

D I Y   S h o p