White Tulip Designs » Inspiration, Design, and DIY for all of life's events.

Masthead header

Kitchen Inspiration

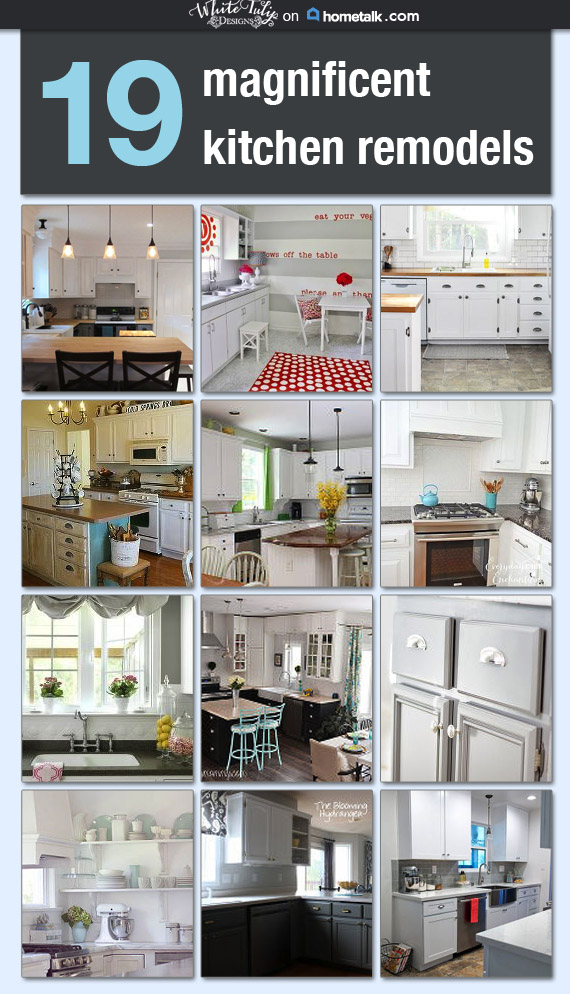
I was recently asked to put together a special board for Hometalk.com that shows some great inspiration for a new kitchen renovation. My board will be featured in the next Hometalk newsletter. The board is full of comments and ideas for any kitchen reno project, big or small. All of the kitchens shown incorporate beautiful and unique design details. And, quite a few of them have directions for the projects they included.

Come over and see the whole group, I’m so excited for you to see the collection!


whitetulipdesigns1712


Book Review - Young House Love

I have a bit of a weakness for collecting design and DIY books so I thought I would share some of the hits (and misses) from time to time. There are so many out there, hopefully these reviews will help you decide next time you’re on the hunt for one.

Last year, for Christmas, I bought a copy of Young House Love for my pre-teen niece. I almost never get to shop for girls and she’s super fun to shop for! She’s a crazy smart, incredibly artistic and creative pre-teen. I took a shot in the dark and bought her a copy of  “Young  House Love”.  It was a hit! (Whew!)

I highly recommend it for almost anyone on your shopping list (of almost any age!). If you’re not familiar, the book is written by the adorable couple behind the Young House Love blog.  The also have lots of guest projects presented by other inspiring bloggers. It is a must-have for any DIY beginner or enthusiast.  Its the perfect gift for anyone on your list who is planning a renovation, a new home owner, or even a teen with a great eye for interior design!


index


Young House Love was a great help when I was putting together ideas for our most recent reno. I basically keep my copy on my desk and reference it often. The pictures are lovely and clear and the writing is entertaining and easy to understand.  The best part is how wonderfully inspiring it is. After looking through the bedroom section was pretty disappointed that I didn’t have a need for one of the adorable headboard ideas. At the end of the book they offer a lengthy list of magazines and websites that are great references for even more inspiration. I sincerely hope they will be following up with another edition soon!


[…] you remember my review from a few months ago (see here) you know I have a weakness for crafting and DIY books. My plan is to share reviews of my […]

10 minute wreath project

So, I’ve been worrying over a new wreath project since before Halloween. I’ve poured through different ideas to come up with something unique, fairly inexpensive and easy to put together. Well, as it typically goes, I came up with an adorable idea, pulled together the supplies and then never seemed to find the time to actually put it together.

Left with a naked wreath form, I hung it on my metal back door using magnet hooks. We’ve started to collect a stack of Christmas cards with no-where to display them. It took about 2 minutes to figure out that, armed with a handful of bulldog clips (various sizes) I could solve my problem and save my beautiful new wreath project for next year! Fa la la la la, la la la la!!!

After I got all of the cards clipped on, I popped a bow on top and it took almost no time at all.  I spaced the cards out a bit and there’s still plenty of wiggle room to work in more cards as they come in!


10-Min-Wreath


Linking up at Met Monday!


Kitchen Pin Board

Pinboard Main

For today, I wanted to share a project that does double duty for me.  The electrical panel for our house is smack in the middle of the only wall in my kitchen. It’s an eye-sore to say the least and it’s been a thorn in my side since we’ve been in this house. #designfail -for sure! So, I’ve been trying different ways to hide/camouflage it for years.  It’s huge and everything I’ve tried so far ends up just being a bigger problem.  See what I mean . . . . I primed and painted it when I painted the kitchen to help it fade into the wall. It did help, but it’s still there.


Panel


I didn’t want a huge, heavy, cork board or anything that was bigger than the dimensions of the panel but I couldn’t find anything close. SO, I figured out that if I put together 2, pre-made streched canvases they matched exactly! Yipee!


Tools List:


Pinboard 2Pinboard 3


Start by lining up the canvases and use the stir sticks/craft wood to brace at each joint.  Stir sticks are the perfect width for the canvas frames.  Smooth out the felt fabric and center your canvas frames on top.  Trim around the edges and leave a wide margin (about 5 inches) to fold over all edges.


Pinboard 4Pinboard 5


Cut and trim the corners to make the edges smoother.  Fold them over and staple in place. I used clear tape to hold the extra pieces in place while I put the put the upholstery fabric in place.  Use the same technique for covering with the upholstering fabric that you used with the felt.  I found that giving a wide margin for folding over helped make the overall pin board smoother.  When the top fabric is stapled in place use a large ruler and erasable fabric marker to layout where the upholstery tacks will go.


Pinboard 6               Pinboard 7


Measure the sides and top of your board to find the middle of each. You’ll want to place the tacks around 2-3 inches apart. HINT: You can visualize the finished piece by place the tacks upside down around the board.  Start by marking the corners (about an inch from the edge) and work your way to the middle in even increments.


Pinboard 8

Pinboard 9


I used small hooks attached to the top of the panel to attach the pin board to be easy to remove if we need to use the electrical panel. And I use map pins to tack up pictures and postcards.


Pinboard Main


Linking up at Wow Us Wednesday, The Scoop,  Met Monday, & Remodelaholic


[…] Water Bottle Holder at My Love 2 Create / Pottery Barn Inspired Filing Cabinet at The Roane Home / Custom Kitchen Pinboard at White Tulip Designs […]

[…] Kitchen Pin Board […]

Jennifer (White Tulip Designs) - 08/15/2015 - 6:55 pm

Canvai, definitely! Thanks for stopping by!

Michelle James - 08/15/2015 - 4:59 pm

Nice cover up! This looks so good and if it fits perfectly…even better. I love canvases…canvai?…just canvas? Anyway, They make good projects for a lot of ideas.

Thanks for linking up this week at #HomeMattersParty

WORK IT WEDNESDAY - 07/15/2015 - 9:32 am

[…] Water Bottle Holder at My Love 2 Create / Pottery Barn Inspired Filing Cabinet at The Roane Home / Custom Kitchen Pinboard at White Tulip Designs […]

[…] How to Clean and Organize the Garage at Clean & Scentsible / DIY Hook Rack at Greco Design Company / DIY Water Bottle Holder at My Love 2 Create / Pottery Barn Inspired Filing Cabinet at The Roane Home / Custom Kitchen Pinboard at White Tulip Designs / […]

[…] Water Bottle Holder at My Love 2 Create / Pottery Barn Inspired Filing Cabinet at The Roane Home / Custom Kitchen Pinboard at White Tulip Designs […]

Glitter Garland

Glitter Garland - 1


Oh Joy! This is much easier than it looks. It takes a lot of drying time and all the glitter and string was a bit more than Ashley (the cat) could take.

Supplies:


Glitter Garland - 2     Glitter Garland - 4


I used wooden letters that were a little over an inch tall. Start by using a paintbrush to coat each letter with a thin layer of Mod Podge (both sides). I used a small snack bag with extra fine glitter and tossed the letters in. I shook the excess into the bag and set them out on a board (face up) to dry for about 2 hours.

IMG_5151


At that point, I painted another coat of Mod Podge over the front of the letters to hold the glitter in place and let it dry over night.  The next morning, I painted the Mod Podge onto the backside and used it place the twine along the backside of the letters.  As I finished each word I went back and glued over the twine to add extra strength to hold the twine in place permanently.

Glitter Garland - 5


From there, let the garland dry for about 6 hours before using it.  I attached clear beads to either end to give them weight and help hold them in place. And . . . . . Ta Da! Here she is!


Glitter Garland - cover


button_cut

Glitter Garland - Inspiration DIY - 12/14/2014 - 7:01 am

[…] See it HERE! […]

D I Y   S h o p