

Oh Joy! This is much easier than it looks. It takes a lot of drying time and all the glitter and string was a bit more than Ashley (the cat) could take.
Supplies:
- small paintbrush (cheap)
- Mod Podge (I use the matte finish)
- extra fine glitter
- small wooden letters - (similar)
- twine - charcoal (from the Twinery)
- glue
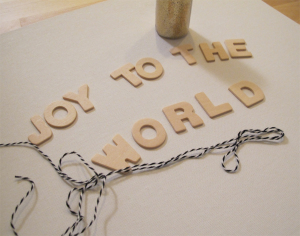
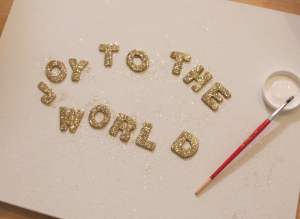
I used wooden letters that were a little over an inch tall. Start by using a paintbrush to coat each letter with a thin layer of Mod Podge (both sides). I used a small snack bag with extra fine glitter and tossed the letters in. I shook the excess into the bag and set them out on a board (face up) to dry for about 2 hours.

At that point, I painted another coat of Mod Podge over the front of the letters to hold the glitter in place and let it dry over night. The next morning, I painted the Mod Podge onto the backside and used it place the twine along the backside of the letters. As I finished each word I went back and glued over the twine to add extra strength to hold the twine in place permanently.
From there, let the garland dry for about 6 hours before using it. I attached clear beads to either end to give them weight and help hold them in place. And . . . . . Ta Da! Here she is!


Jennifer (White Tulip Designs)
[…] See it HERE! […]