White Tulip Designs » Inspiration, Design, and DIY for all of life's events.

Masthead header

Farmhouse Vase


Jar Vase - WT - 7


Now that I’ve discovered the wonder that is Trader Joe’s and their gorgeous (not to mention CHEAP!) flowers I tend to buy fresh flowers pretty often. But, I’ve realized that I never have a suitably sized vase. I have a few bud vases and a few that would work for a large bouquet but nothing for a sweet little grocery-store sized bunch. So, today I’m sharing a sweet little “vase” project that is just right!

You’ll start with blue painters tape and a large canning jar (I used a wide mouth, Ball brand jar.)  I also used Country Chic’s All-In-One Elegance paint as well as Country Chic’s White Wax.


Jar Vase - WT - 1b


To create a more farmhouse, vintage look I used the “Elegance” blue from Country Chic Paint.


Jar Vase - WT - 2


I taped out a wide band around the lower portion of the jar, leaving the decorative detail open so I could free-hand that part. Then I let it dry for about 3 hours.


Jar Vase - WT - 5


Using a lint-free cloth, I applied a coat of Country Chic’s white wax, going a little heavy around the details to make them really stand out. I used a Q-tip to clean up around the edges where the wax went beyond the painted area.

To be sure the wax had time to dry really well I let it sit for about 3 days before I added flowers. It’s the perfect addition to add a bit of farmhouse flair!


Jar Vase - WT - 6


Thanks for stopping by! See you soon!


.

Five Dollars, WELL spent!

Today I’m sharing my first project for Country Chic Paints!  I lucked out and found this sad little table when I was thrift store shopping a while back and just new I could save her. Not to mention, she’s the perfect choice for a new side table. 


Metal Table 1


Pretty yucky, right? After I got her home, I proceeded to strip, scrub, and sand as many layers of paint and rust off as possible . . .


Metal Table 2


It was an even bigger job than I thought. Once I used everything I could think of to clean her, I used a heavy duty primer to seal the metal from top to bottom. And, still, there were some pits on the surface (grrrr). Thanks to Country Chic Paint’s Embossing Plaster and a putty knife I was able to smooth out most of the surface.


Metal Table 3


Metal Table - WT - 6

Worked like a charm! I let it dry overnight, gave it a light sanding, and then I painted her with Country Charm’s “Simplicity” white, all-in-one paint.

Isn’t she lovely!!!

Metal Table -Cover


This was my first chalk paint furniture project and it will definitely not be my last. I’m loving the coverage and hoe easy it is to work with!!


Metal Table - WT - 8


I hope you enjoyed it! See you soon!


Rustic Window Mirror

Last summer I was poking around my local Re-Store and found a fantastic pile of used windows for $5 each! (If you are looking for used building materials, etc. try your local Re-Store, they are a great resource.) I really didn’t know what I would do with them but I grabbed 3 since I knew I’d never find them like that when I did have a project in mind. When I started thinking about doing some rehab on our guest room I found just the perfect project for one of them. 

I wanted to have a large piece to center over the bed that I could add pictures and other items as I collected them. So I turned the window into a rustic-looking mirror. It’s not meant to be so clear that you can do your make-up just a reflective surface to add some character and a bit more light to the room.

Cover - Window Mirror


It was pretty rough  to start with so I used a wire brush and sand paper to clean the window as well as I could.


Window 1


After it was nice and clean I taped off the panes and sprayed the back of each pane with Rust-Oleum Specialty Mirror Spray.  Once it was dry, I painted over the “mirror effect” paint with a heavy gray (I used leftover paint from the kitchen cabinets!) to help seal it in. Then I painted the front of my window in a basic black. It required lots of drying overnight, etc. but all in all it was a fairly simple process.


Here’s a quick, step by step, slideshow . . . .


And here she is! I used heavy duty wall anchors in the wall and large lag eye-screws to attach it (links show similar items). The wall anchors I used are rated to hold 65 pounds each so she’s not coming down any time soon.


Cover - Window Mirror 2


See you soon!

*This post contains affiliate links but all views regarding product recommendations are my own! For more info refer to my policies page, thank you for stopping by!

Quick Garden Spruce Up

The last two weeks I’ve been spending a lot of time in the garden getting things spruced up, adding mulch and fertilizer, checking to see who made through the winter and adding in some “annual” color.

Tour - 7


Last year I ordered a peony through our landscaper and I’ve been watching him emerge from the ground with utter amazement. I didn’t realize he would die back so far and I really thought I’d lost him. The first pic is from a few weeks age and the second is from today!


Tour -Peony 1                                           Tour -Peony 2

Since I started the garden spruce-up I do a little tour to see how everyone’s doing and watching all of my perennials wake up. I think this may be the year that my hydrangeas really make show. (Fingers crossed!) And, we’ve decided to add some new azaleas to fill in different corners of the yard. I’ve always wanted to have giant ones like my Grandmother had in her yard when I was growing up. I swear they were as big as a Volkswagen. So today I thought I share some of my favorites and let you join me on my daily garden tour! 


Tour - 3                                                      Tour - 2


Tour - 5


Tour - 6                 Tour - 4


Here are some of my favorite perennials and annuals. If you are new to gardening and uncomfortable about getting started try container gardening. If your plants don’t fair well (or you change your mind about where you out them) you can’t rearrange your whole garden! I still like to use pots to give some height to lower growing flowers. Be sure to check the USDA plant hardiness zone map before you start purchasing any plants.

Perennials can be sort of pricey to fill your entire garden with so I like to add a few more each year. It also give me chance to get and idea which work better and where. To avoid losing any, be sure to check whether your plants are full sun, part sun, or shade lovers, what type of soil they prefer and how much water/fertilizer they require before you plant.


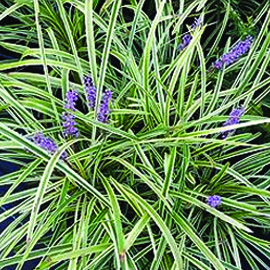
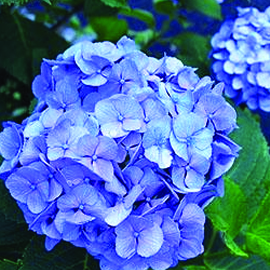
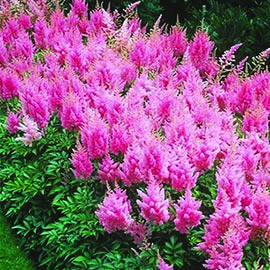
Collection of  Reliable Perennials:

Salvia               Liriope

Hydrangea               Astilbe

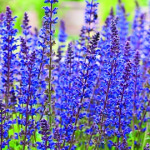
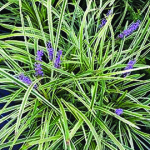
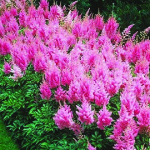
Salvia, Lantana, Liriope, Phlox, Hydrangea, Echinacea (Cone Flower), Peony, Astilbe & Lavender

Annuals provide a splash of color that will fade (and die) at the end of the season. Some will die in late summer and some will go in early fall. (Check your zone for the best idea of when you’ll start to lose them).  However, if you live in warmer climates you may be lucky enough to hang on to your annuals for more than one season. This can sometimes happen if the grower is located relatively close and in the same zone. Don’t count on it but keep that in mind when planning next years plantings. I tend to have great luck getting about 50% of snapdragons to come back for a year or two!


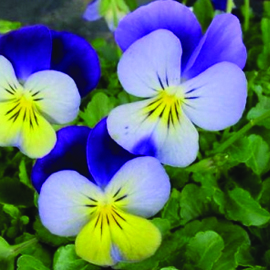
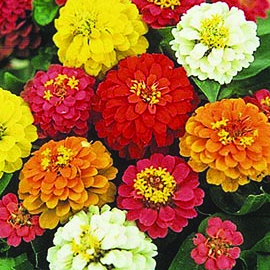
Favorite Annuals to add a Splash of Color!

Geranium                Pansy

Snapdragons                Zinnias

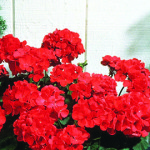
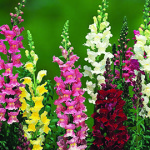
 Geraniums, Begonias, Pansy, Marigolds, Snapdragons, Morning Glory, Zinnias, &  Impatiens


I hope this gives you some great inspiration! Feel free to pop over and share some garden inspiration on my Facebook page!

See you soon!! Have a lovely day!


Market Time!

Cover

Our local farmer’s market opened this week! And around here that means that warm weather is officially here to stay for a while.  I never really shopped at farmer’s markets too much until I moved out this way and now I really don’t know how I survived without one. Ours is owned and run by the most wonderful family. They have seasonal plants, as well as a fantastic array of fruits and veggies. Not to mention a great range of dairy products from a local dairy. If you follow my Instagram, you know I can’t resist sharing pics of our visits!


Jams and Jellies


Farmer’s Markets are the best place to find “local honey”. And, if you’re traveling south, you’re guaranteed to find the best boiled peanuts around!

      Boiled Peanuts


If you’ve never stopped at a roadside farmer’s market, it’s time to you give it a try! You have no idea what you’ve been missing!!


local honey


I’d like to send a special “Thank you!” to our local market, Bob & Lisa’s for always offering great food as well as great kitchen and garden advice! 

To celebrate the first day of April here are some fresh strawberries for you! Well, printable strawberries and a bonus printable calendar!

April Collection


April Calendar


Download your April printable collection here!

Or, if you’re interested in purchasing the strawberry artwork included in the printable collection, pop over to my Etsy shop here!

See you soon!

D I Y   S h o p