White Tulip Designs » Inspiration, Design, and DIY for all of life's events.

Masthead header

All lined up!

This week is all about liners! Whether you want to start from scratch and create your own or purchase a pre-made lovely and affix them yourself, I’m going to show you the best ways to add a little flair to your cards and invites.

I love the extra detail that a lined envelope adds. Unfortunately, not all envelopes and pre-made liners match up quite right. When I first started my business, I quite often had requests from clients who had chosen a specific envelope and wanted custom liners to match even though there wasn’t a liner available. SO, I was tasked with creating my own template for each envelope. (Not quite as ugly as it sounds.)

Here I will show you how to create your own contour or pointed flap liner.  Look for a “square flap” tutorial coming in a future post.
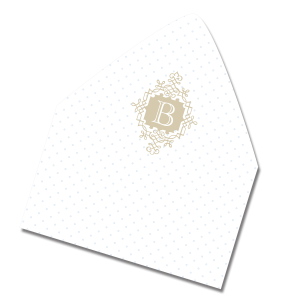
Lillian liners

There are several great online sources for stationery pieces, especially envelopes. Make sure you order at least 10% more envelopes that your address list dictates.  When you have your envelopes in hand chose one to make your template from. If you have one that’s a little dinged up from shipping that’s perfect for this project.

-First, carefully pull apart your envelope at the seams and open it flat with the “flap” pointed up.

Series 1

-Then, measure approximately 1/4 inch (0.6 cm)  from the edge along the sides and bottom of the body of the envelope.

Series 2

-For the flap, use a straight edge to trace along the gummed portion of your envelope (or, about 1/2 inch, 1.3 cm,  from the edge if your envelope is ungummed) For the tip, either trace to a point or free-hand the curve, depending on the style of your envelope.

Series 3

-Cut out your liner template along the trace lines.

Series 4

-Use your template as a guide to trace onto a piece of heavy-weight cardstock or chipboard, then cut out your stencil.

Series 5

-Print your desired liner onto a text weight paper (editable, printable files here and below.) In this case, the thinner, the better. Scrapbook papers works pretty well for this project.  Once it’s printed, flip onto the back center your stencil along the bottom edge and trace your liner.

Liner 17

-Finally cut out your liner and affix to your envelope! For the matching printable invitations see HERE.

How to best line your envelopes coming soon  .  .  .  .

Downloadable liner files: editable WORD.doc & PDF


Baby It’s Cold Outside

Around here winter is coming in with a vengeance and, although I’m not so thrilled with the temperatures, I love the cozy feeling frosty weather brings. Especially when I can spend it inside cuddled up with the boys. This weeks inspiration features one of my DIY designs for  a rehearsal dinner/show invitation. Later this week I will be posting a tutorial on envelope liners with a printable file of the matching liner art.

Touches of ivory, toasty-taupe and shimmery frost are perfect to show off a winter event.  Cuddle up, stay warm, and enjoy a little taste of winter!

Baby It


left to right & top to bottom
1. Maggie Austin   2. Christian Keenan at CKP Weddings  3. This is Glamorous
4. White Tulip Designs   5. Martha Stewart   6. Snowflake Earrings -joojooland   7. Q Weddings Photography, Polkadots Cupcake Factory
8. Photographer: Claire Morgan  9. This is Glamorous

Thanks! See you soon!

Happy New Year!

At the end of every year, like every one else, I like to look back on things that went well and make plans to do things a little better in the coming year. This year, my goal is to spend more time with the boys. More home-cooked dinners, more date-nights, and more one on one time with G. Wouldn’t we all be so lucky! Anyway, this year, I’m determined to achieve the dream.

So, to kick off the year of creating more time, I’m offering a printable download set of calendar pages starting with January. Toward the end of each month you will find the next month’s printable page.

January 2013

Download PDF printable here.

(If you’d like a chalkboard option see Tallulah & Gage.)  Check back late January for your February calender!


Fireflies at Sunset -pt2

Kelley & Zack’s Romantic Fall Wedding


Kelley and Zack were married last fall in a romantic sunset wedding while standing on the steps of an historic, South Carolina home. Personal touches and awesome details made for an amazing and memorable day!

Kelley -Chopper

Kelley sunset

Kelley -board 2

Kelley -board 4

Kelly2_HannahB


Kelley -board 3

Kelley -board 6

Kelley -board 5

See more details and inspiration: here!

Paper Goods: White Tulip Designs
Hair & Makeup: Katie Bannister with Midtown Salon
Photographer: Hannah Brooke
Venue: Evergreen Plantation (Starr, SC)
Catering: Smoke on the Water
Florist: A Basket of Blessings


Small Business Saturday

In celebration of Small Business Saturday, I thought I would highlight a few online businesses that I happen to like quite a lot. Remember, when you’re thinking of your neighborhood shops, some of them are as easy to browse as your computer screen.

I’ve asked each business owner a few questions to get to know them a bit better. Links to their info pages are shown under their pictures.

I’d like to thank Plumes & Pearls, Paper Mojo, and Back40 Life for participating in our first salute to Small Business Saturday!

Plumes and Pearls - owner/ designer -Andree West

Andree designs amazing clutches for everyday and special occasions. You can’t miss her creative touch in every one.

mom headshot                                   pink gray feather bridal shoot

For more information on Plumes and Pearls see here!


Paper Mojo - owners - Shelly Gardner-Alley & Megan Alley

Paper Mojo is my go-to for high-end crafting and wrapping papers. Shelly, Alley, and Sara have an amazing collection of fine papers from all over the world, for any project you can imagine!

Megan_Shelly                                   invites

For more information on Paper Mojo see here!


Back 40 Life - owners/designers - Brad & Jodi Williams

I’ve had the pleasure of collaborating with Back 40 on a few projects and I am pleased to feature them here. They are always happy to try new projects and a joy to work with.

Brad & Jodi         il_fullxfull.196088359

 For more information on Back40 Life see here!


D I Y   S h o p