
I love, love, love the shades of white, cottage chic, clean and simple trend. (Think Joanna Gaines or Sarah Richardson.) However, here in my world that clean look would last about an hour and never be that white again. Seriously, who really does that. I’m fighting the good fight though. Currently we have brown sofas and I’m tired of how dark it all looks so I’m working on a little project to lighten things up a bit.
I’m adding some new, brighter, pillows but I’m also working on updating the factory ones that came with it. This first one isn’t too difficult but the pillow was beyond sad when I started but I’m quite pleased with how well it turned out.
- Start with a length of thin fabric folded and ironed to be roughly inch wide and 3 feet long. *see below
- Using an embroidery or other large needle thread through the end of your fabric to use as a guide.
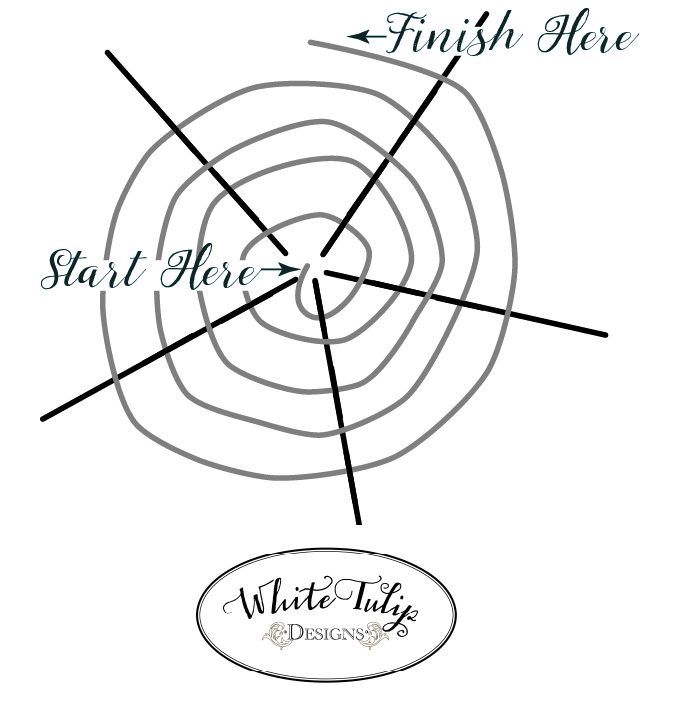
- To create your rosette, start by sewing a 5-pointed “star” using strong, color-coordinating, thread. (See map)

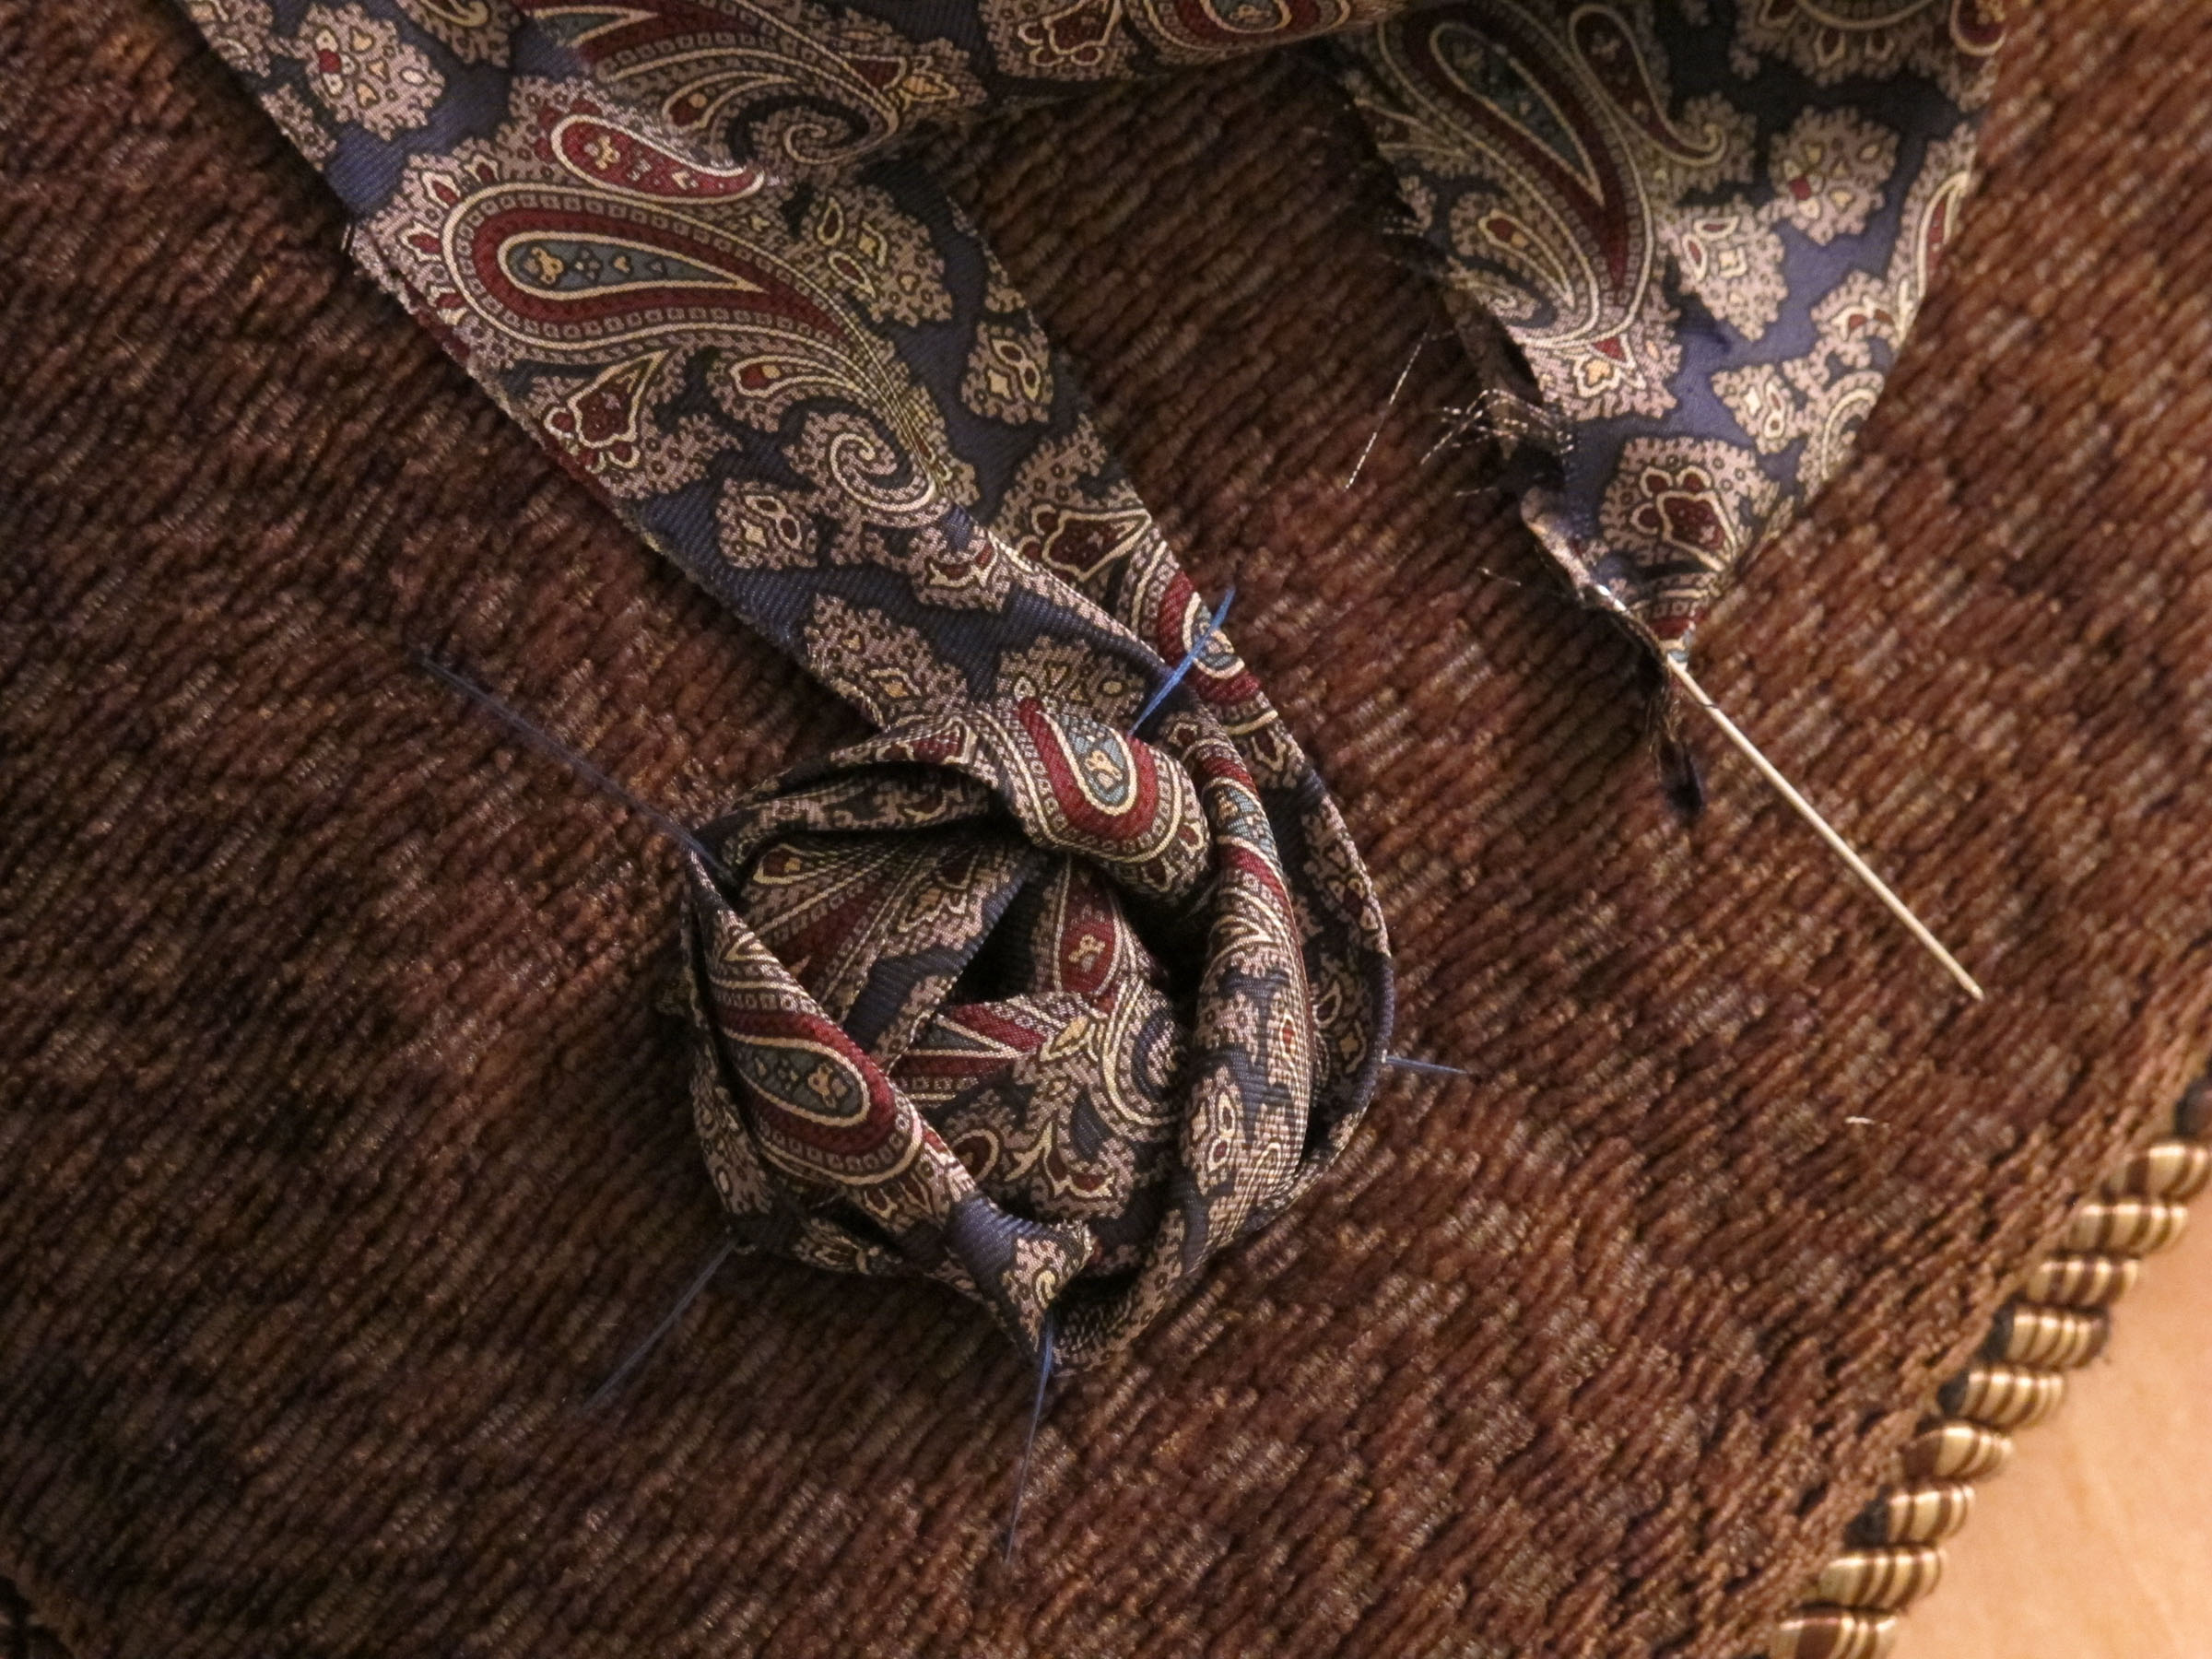
- Start by tacking the loose end down to the center area then, begin to weave the end with the needle over and under the 5 legs of your start.
- Continue, over and under, round and round, until you reach the outside of the rosette.
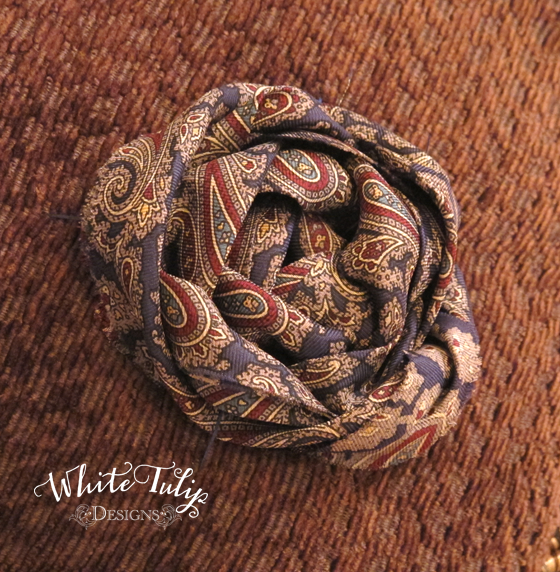
- Tuck the end of the fabric back into your rosette and sculpt it a bit, if necessary. Easy peasy!!
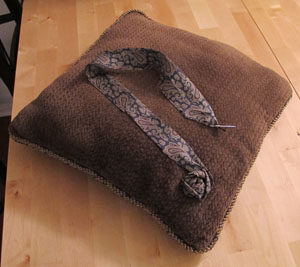
No more boring factory-pillow. Yipee!
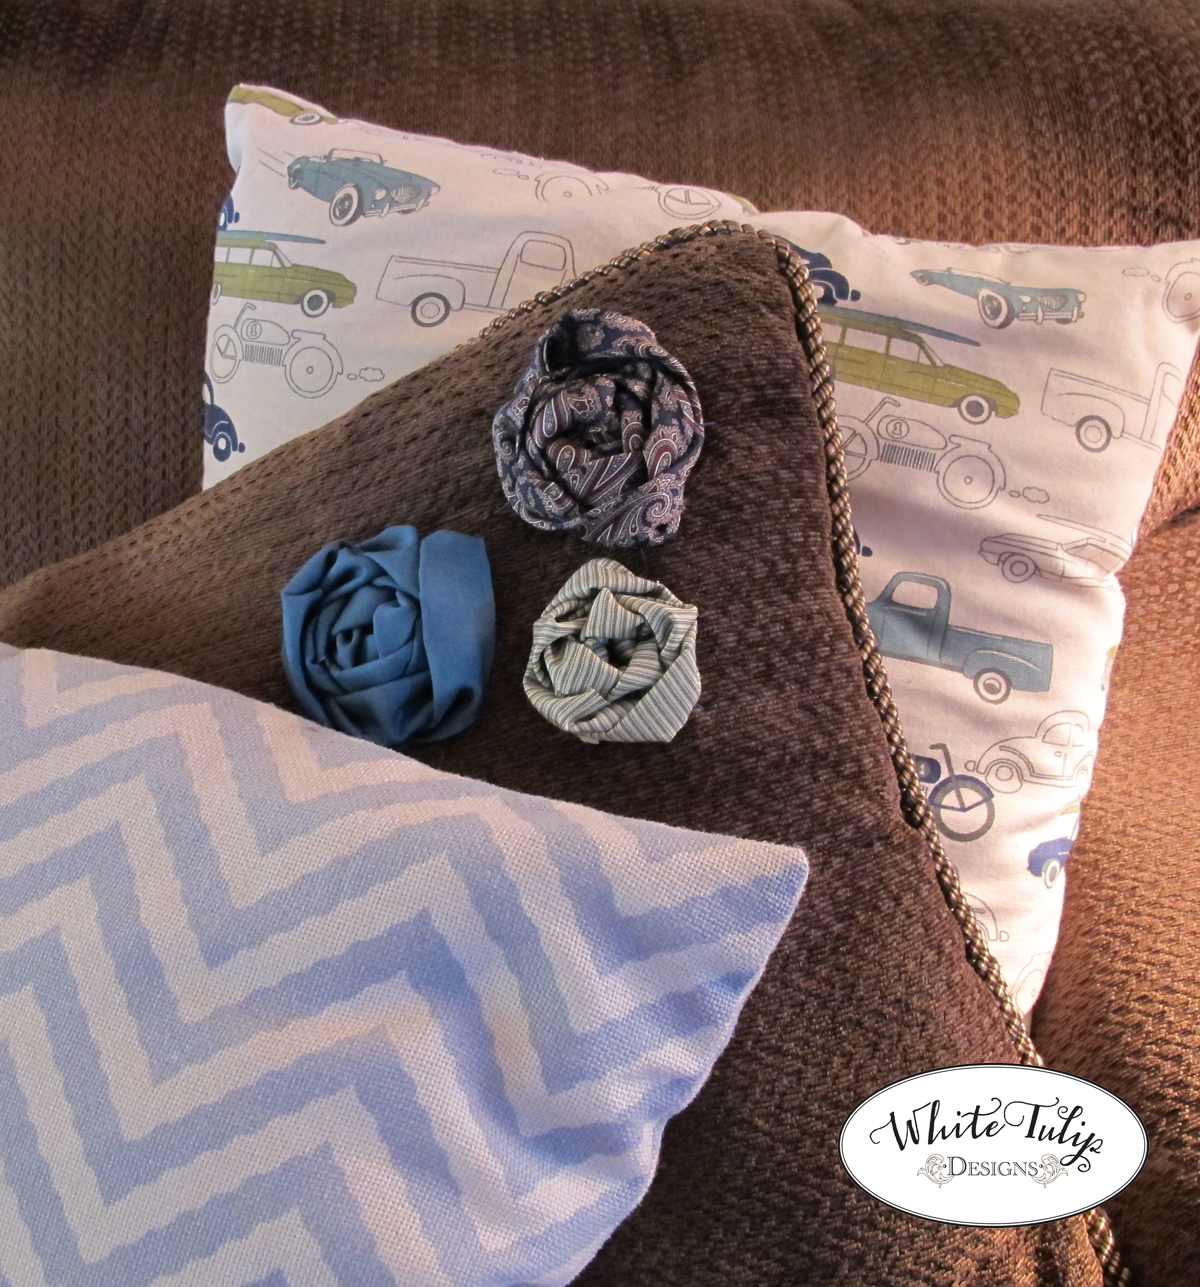
*I found some beautiful, barely worn, silk ties at my local thrift store for $1 each! So I rescued them, cleaned them a bit, pulled them apart and used the length of fabric here! Bonus!


Jennifer (White Tulip Designs)