
This is all about being stuck with a pair of ugly old lemons and making lemonade, Or something like that . . .
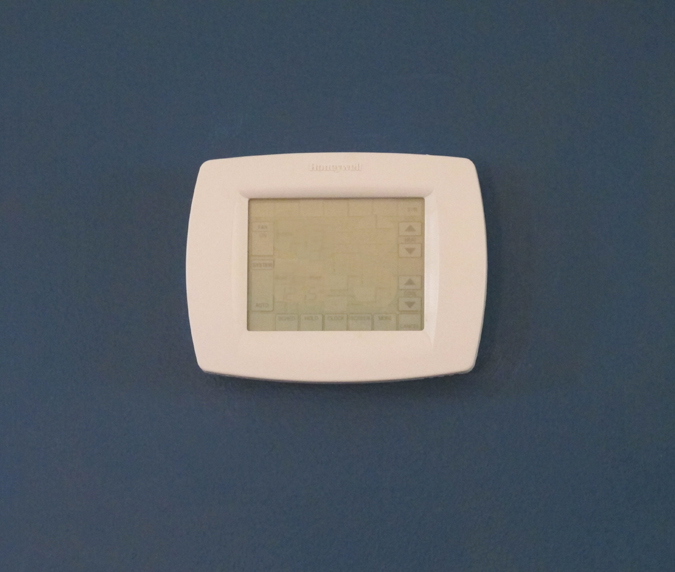
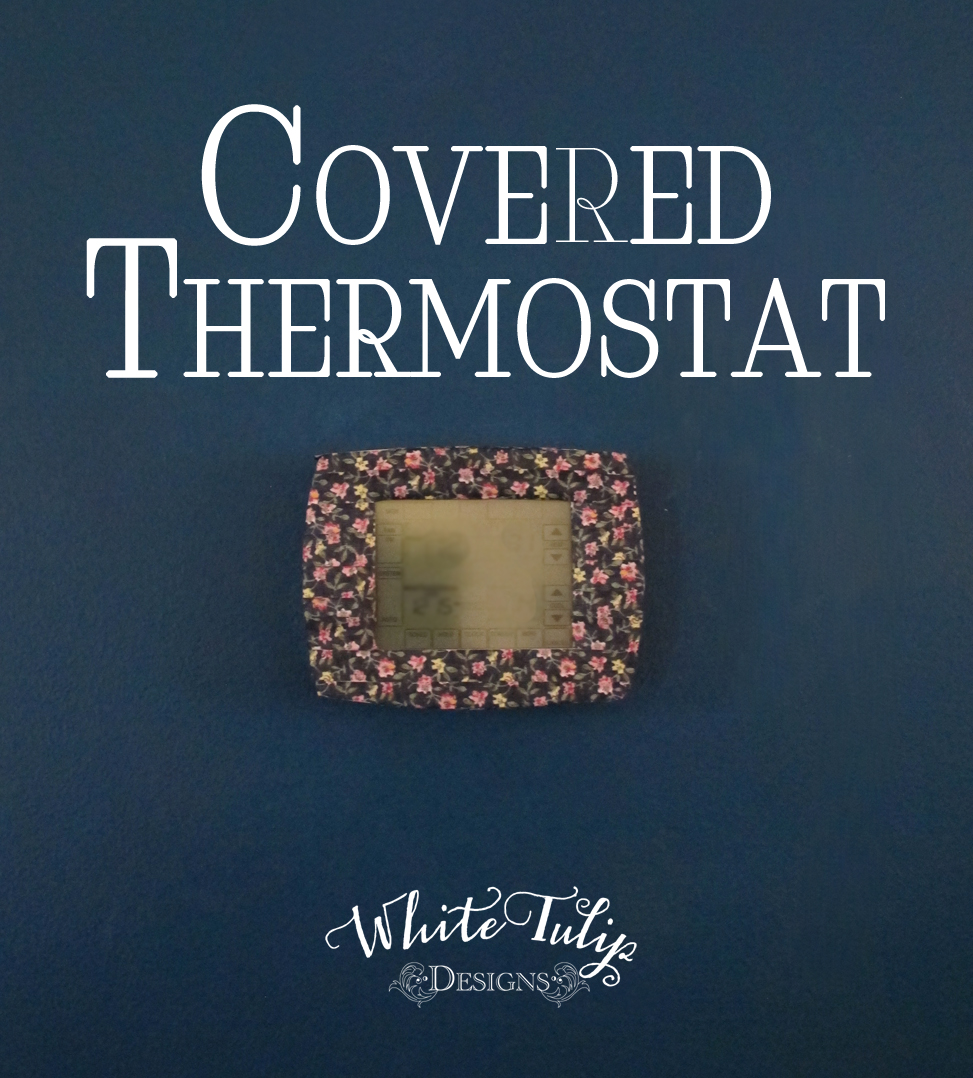
Do you ever feel like you have certain parts of your house are just working against you? I mean, I know that anything can be relocated or reworked but sometimes the cost or event the effort is so far down my wish list it’s just not worth it. But, for the past few days I’ve enjoying my beautiful peacock blue wall and the thermostat and the doorbell chime are just glaring down at me. It’s like the t-shirt tags in those commercials.
BLAH, BLAH, BLAH, BLAH, BLAH . . . I. Can’t. Stand. It.
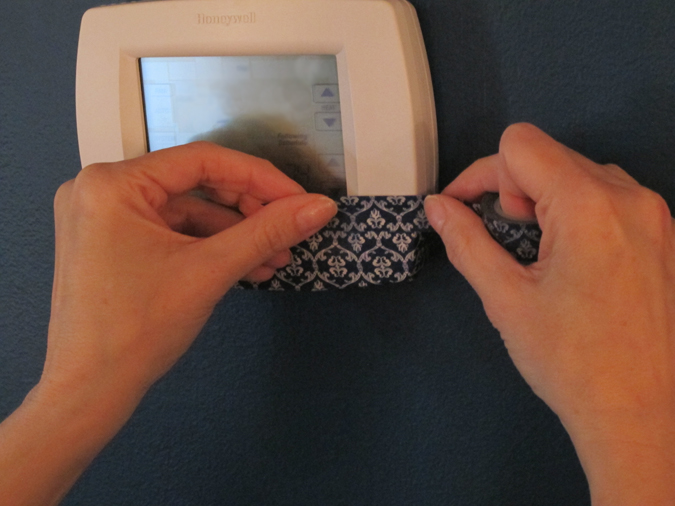
So, Hubbs came home from work the other day to find me wrapping the thermostat, mummy-style with washi tape. Genius! Right? Well, not quite. It was perfect to cover the box I had overdone it a bit covering the censors and the tape started pulling away from the plastic about the time I finished it. I mulled it over a bit and called my craftiest friend and came up with an alternate plan.
I couldn’t bear to remove all that work so G pulled it off for me. He may not be all that into crafting with me but he’s my go-to guy when I need something pulled apart.
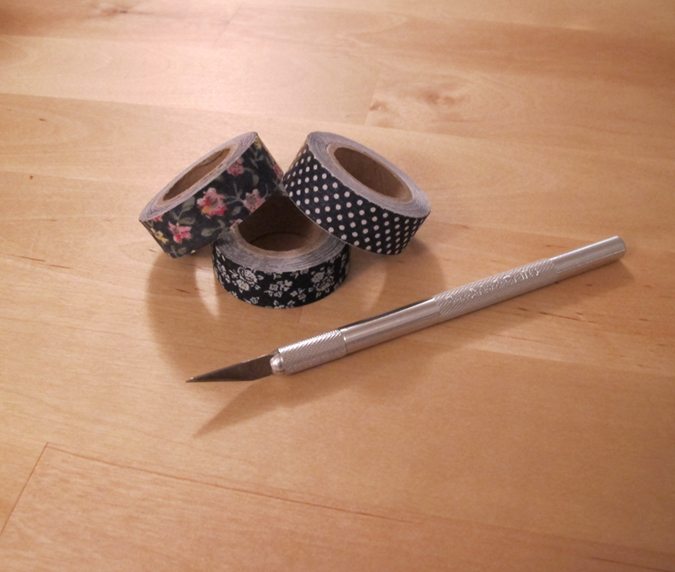
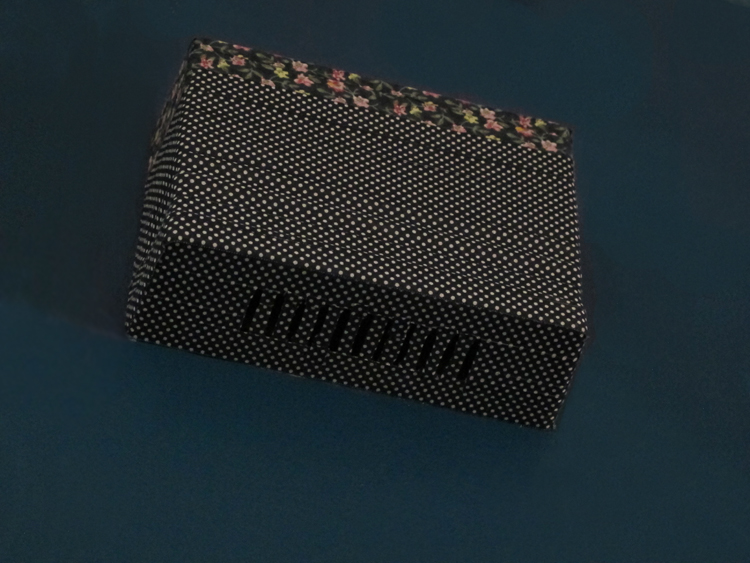
Fabric tape! I haven’t had much of a chance to play around with it but I know that, since it’s fabric rather than paper you can get a bit more wiggle out of it and the tape I’ve worked with is much stickier than washi. SO, now that I’ve figured it out, here we go!
1. Clean the box with a little bit of alcohol being very careful not to get any part of the sensors wet.
2. I used tape in a small pattern so that I could use either long strips or a patchwork of pieces and you wouldn’t be able to distinguish from a short distance.
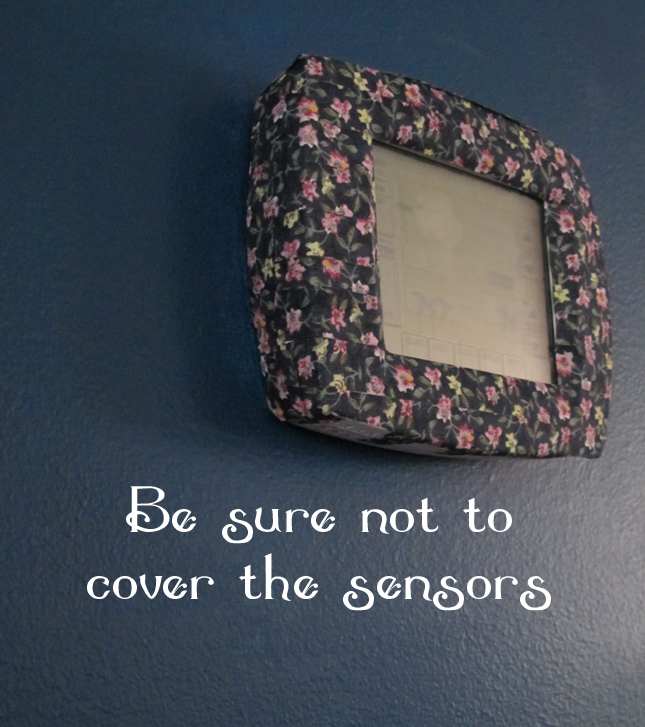
3. I barely put any on top or on bottom where the censors are and concentrated mainly on the face. You should have a button on the screen to “clean” that will keep you from changing your settings by mistake while working on your little masterpiece.
4. You’ll roughly follow the same steps and the chime box is much easier, but I definitely wanted to cover the bottom since it’s so high on the wall.
I don’t have the rest of the wall finished so I can only show the wall with the new covered fixtures. But, oh how much better it looks!! (I’m working on some DIY shelves and some other things.) Even with the cute patterns, it blends into the wall so much better!
Linking up over at Fluster Buster , Savvy Southern Style , and How to Get Organized at Home!


Jennifer (White Tulip Designs)
Thank you Sharon!!
This is beautiful! Thank you for sharing on Monday Madness Link Party 🙂
Thank you! I’ll definitely be there!!
Oh my…cute idea! I always get so excited to see what you have brought to the party! Pinned and tweeted. Thank you for being part of our party. I hope to see you on tonight at 7. Lou Lou Girls
Thank you!
Thanks!
What a great idea for covering such an unsightly necessity!!
Ha, I love it! Ingenious, I never thought to cover that very boring thermostat!